15.3. Exporting and Importing a Course#
When you have released your course, you can use the course export and import tools in Studio to save a backup copy of the course, and optionally re-import your course for editing. For more information, see Export a Course and Import a Course through Studio.
When you import and export a course, you work with .tar.gz files.
To duplicate an existing course for a new run, course creators can use the course re-run option. See Re-running a Course.
Caution
Before exporting and importing a course, ensure that links in the course to
other course content use the /jump_to_id/<unit identifier> syntax. If a
link does not use the /jump_to_id/<unit identifier> syntax, the link will
be broken if you export then import the course. For more information, see
Add a Link to a Course Unit.
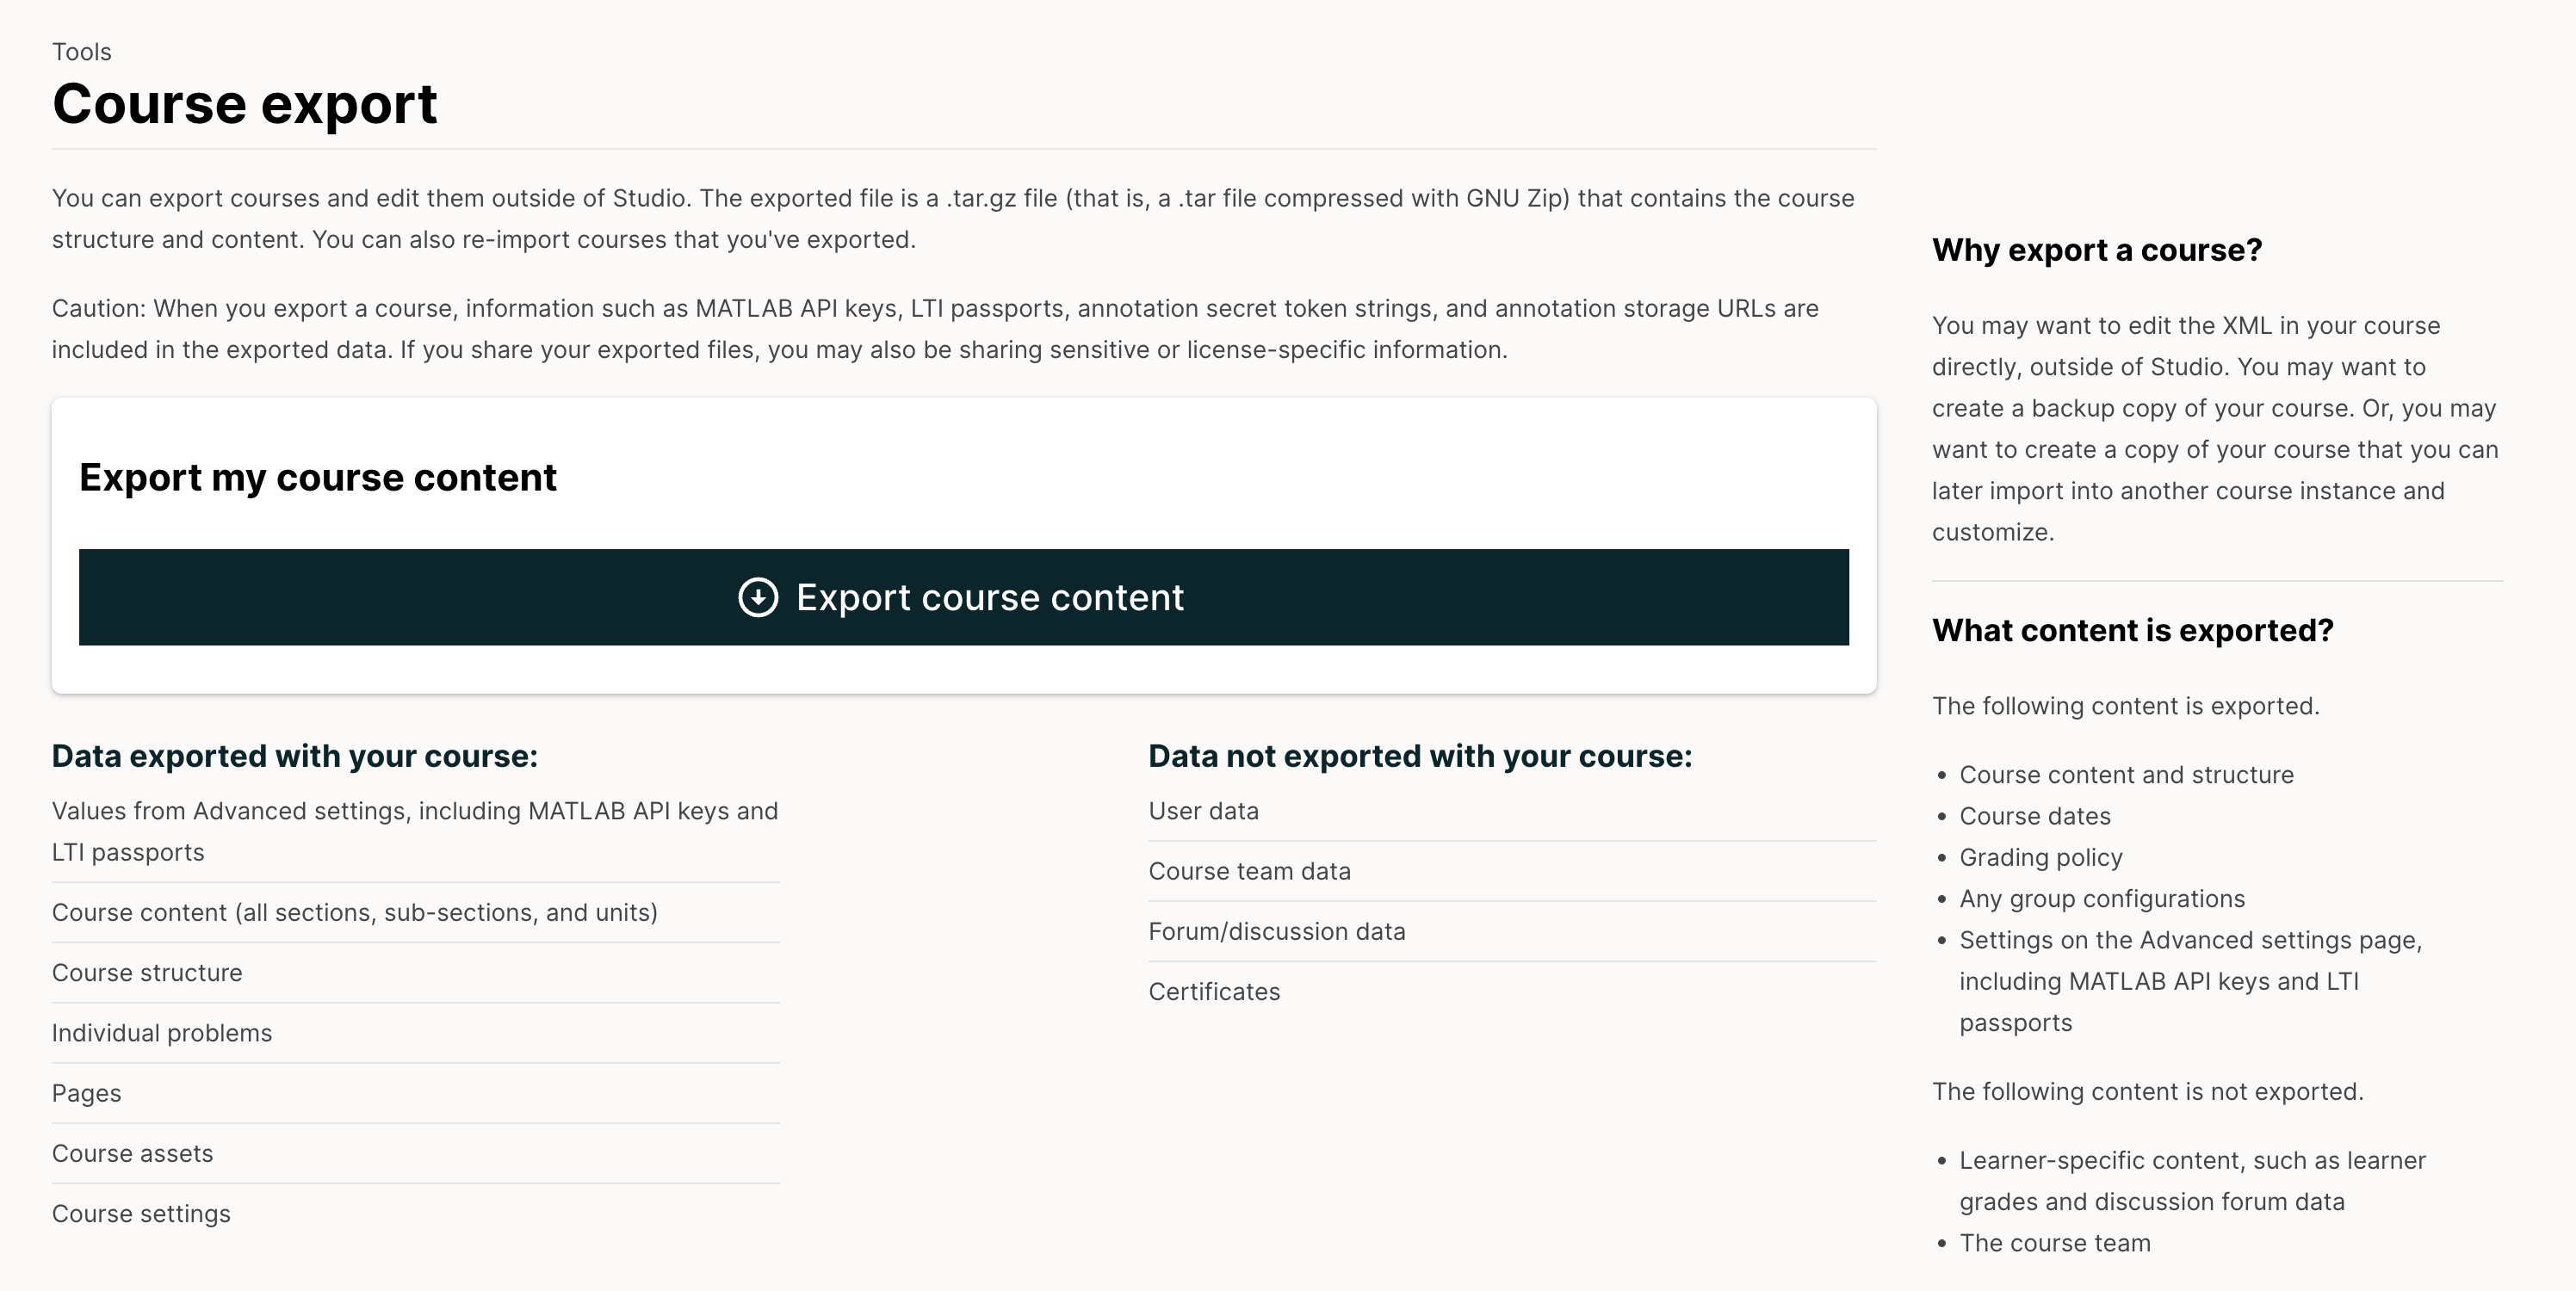
15.3.1. Export a Course#
There are several reasons you might want to export your course. Examples follow.
To save your work.
To edit the XML in your course directly.
To create a backup copy of your course, which you can import if you want to revert the course back to a previous state.
To share with the team members of another course.
To create a copy of your course that you can later import into another course instance and customize.
When you export your course, Studio creates a .tar.gz file that includes the following course data.
Course content (all Sections, Subsections, and Units)
Course structure
Individual problems
Pages
Course assets
Course settings
The following data is not exported with your course.
User data
Course team data
Discussion data
Certificates
Prerequisite course subsection settings
To export your course, follow these steps.
From the Tools menu, select Export.
Select Export Course Content.
When the export completes you can then access the .tar.gz file on your computer.
15.3.2. Course Outline Terminology in Exported Files#
Sections, subsections, units, and components have different names in the Studio Course Outline view and in the list of files that you see after you export your course and open the .xml files for editing. The following table lists the names of these elements in the Course Outline view and in a list of files.
Course Outline View |
File List |
Section |
Chapter |
Subsection |
Sequential |
Unit |
Vertical |
Component |
Discussion, HTML, problem, or video |
For example, if you want to find a specific section in your course when you open the list of files that your course contains, look in the Chapter directory. To find a unit, look in the Vertical directory.
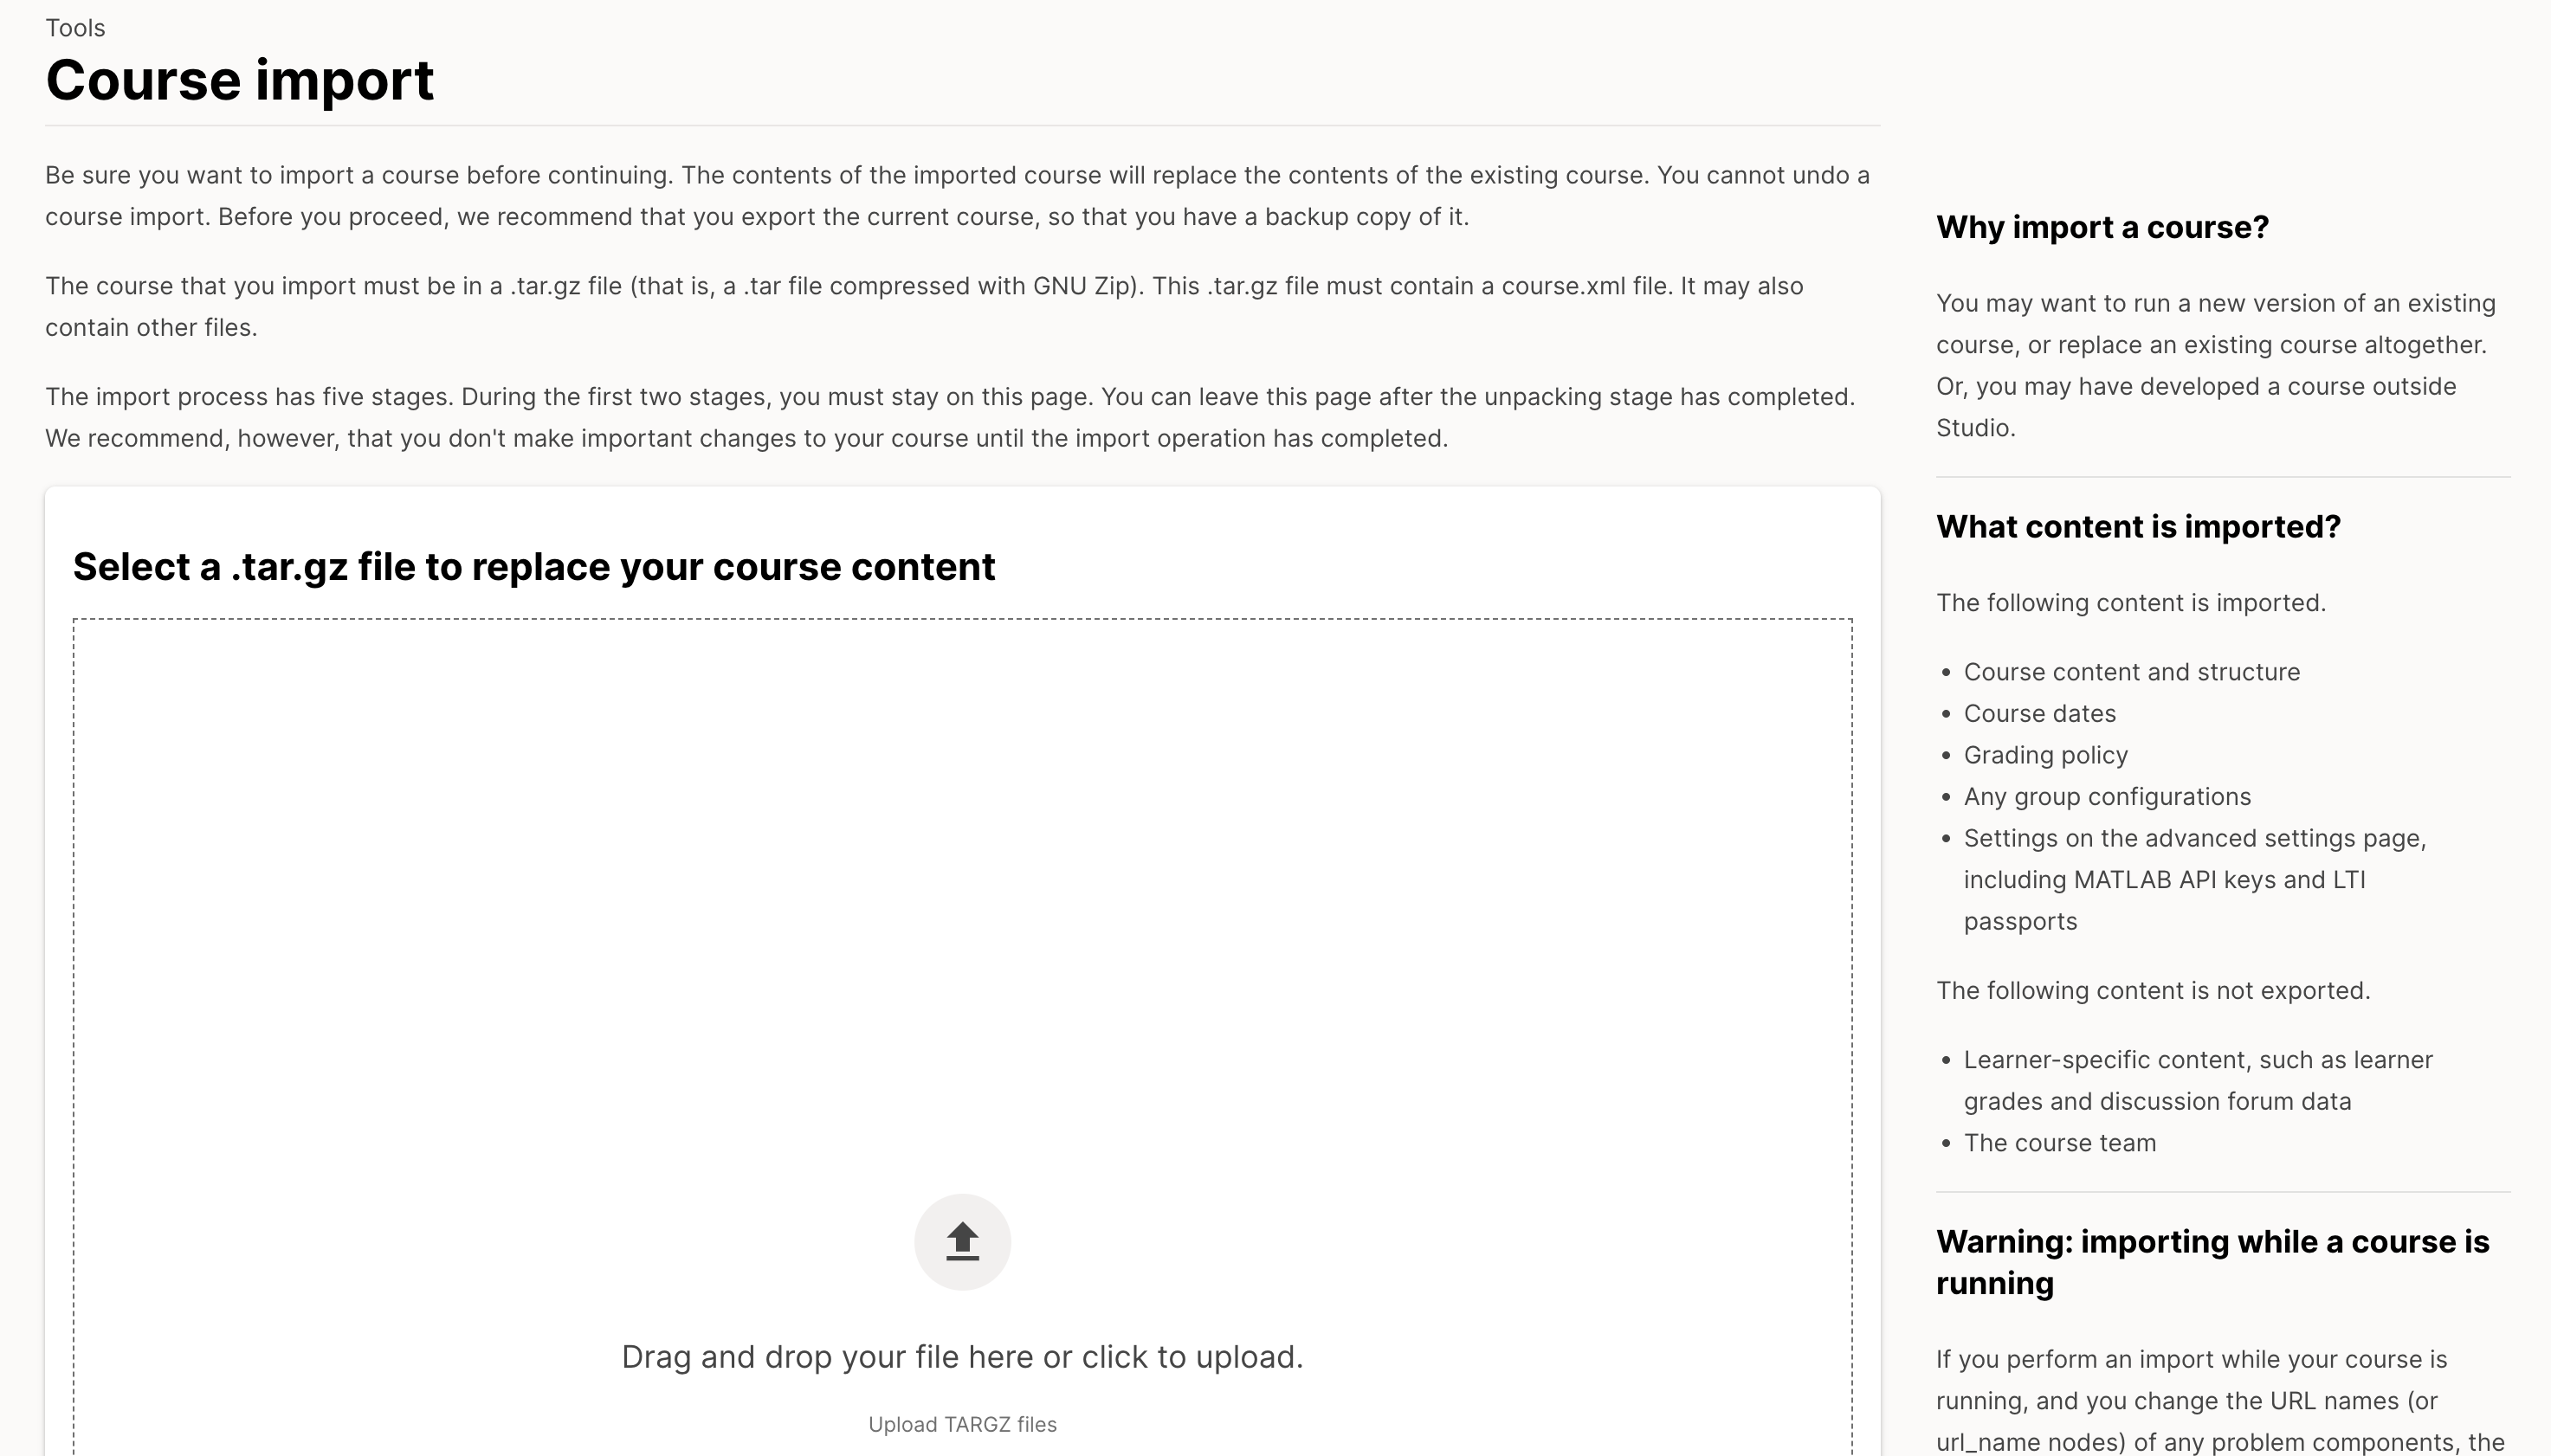
15.3.3. Import a Course#
Warning
Content of the imported course replaces all the content of this course. You cannot undo a course import. We recommend that you first export the current course, so you have a backup copy of it.
There are several reasons you may want to import a course. Some examples follow.
To load a course you developed outside of Studio.
To run a new version of a course that was not created in Studio.
To prepare course content for reuse in another learning system.
The course that you import must be in a .tar.gz file (that is, a .tar file compressed with GNU Zip). This .tar.gz file must contain a course.xml file in a course data directory. The tar.gz file must have the same name as the course data directory. It may also contain other files. For more information, see Work with the .tar.gz File.
If your course uses legacy layout structures, you may not be able to edit the course in Studio. To make sure that your course is completely editable, ensure that all components are embedded in a unit.
The import process has five stages. During the first two stages, you must stay on the Course Import page. You can leave this page after the Unpacking stage has completed. EdX recommends, however, that you don’t make important changes to your course until the import operation has completed.
To import a course, follow these steps.
From the Tools menu, select Import.
Select Choose a File to Import.
Locate the file that you want, and then Select Open.
Note
When you import a course, important dates, such as the course start date and time, are overwritten. After the import is complete, you should check dates to ensure they are set as intended. For more information, see Scheduling a Course Run.
15.3.4. Work with the .tar.gz File#
Courses are exported and imported in .tar.gz files containing OLX (open learning XML), the edX markup format for open course exchange. For more information about OLX, see the EdX Open Learning XML Guide.
To extract and compress .tar.gz files, you use a third-party program.
If you are using Microsoft Windows, see the following resources.
The Windows section of the How to Open .tar.gz Files page
If you are using a Macintosh computer, see the following resource.
The Mac OS X section of the How to Open .tar.gz Files page.