11.2. Adding Course Updates and Handouts
You can create course updates and handouts in Studio.
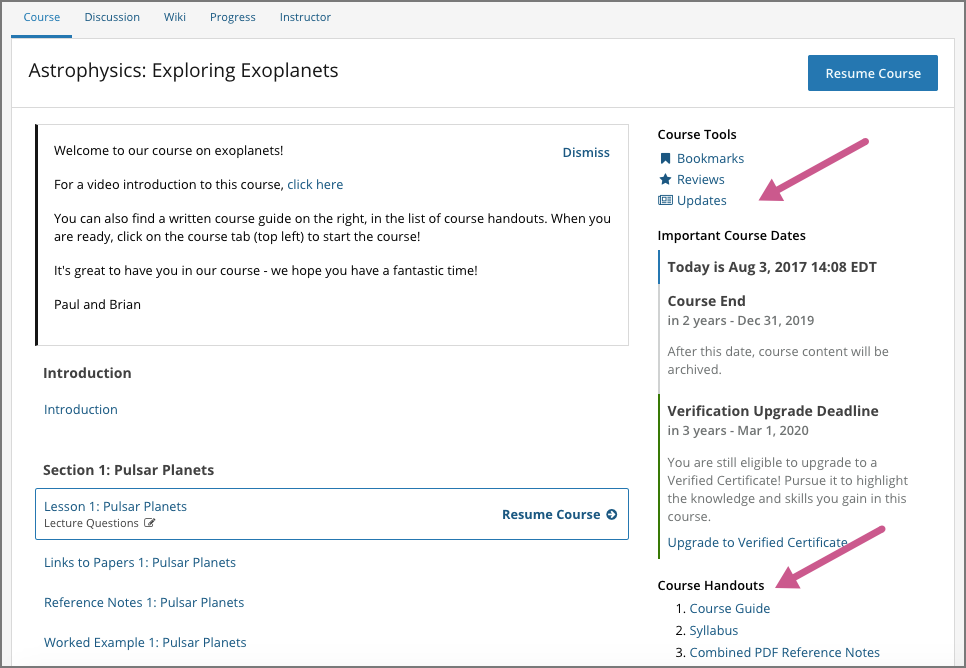
Course updates are communications, especially a welcome message, that learners see at the top of the Course page when they enter the course. A welcome message is an important way of making each learner feel personally welcomed to the course, and of providing orienting information that helps learners succeed with the course.
After learners have read the welcome message, they can dismiss the message. The message is automatically dismissed seven days after the learner first views it if the learner doesn’t actively dismiss it first. Learners can access the dismissed message and any other updates from the Updates link in the sidebar on the Course page.
Handouts are links to files that you upload in Studio, for example, a PDF version of the course syllabus, or an article that you want learners to read. Learners see the list of course handouts under Handouts in the sidebar.
Section Contents
11.2.1. Add a Course Update
You create course updates in Studio. On entering the course, learners see the update that has the latest date chronologically (including dates in the future) on their Course page.
Note
Learners can dismiss the update that displays on their Course page after they have read it. When learners have dismissed a message, they can access the dismissed message and any other updates from the Updates link in the sidebar on the Course page.
On the Updates page in Studio, you see the list of updates sorted in the order that they were created (most recent at the top of the list). If you create a new update, learners do not see the update on the Course page unless it has the latest chronological date of all existing updates.
To add a course update, follow these steps.
In Studio, select Updates from the Content menu.
Select New Update.
Create your update in the text editor that opens.
Enter text for the update, using HTML tags for formatting. This editor is like the raw HTML editor in HTML components. The course update editor does not have a visual editor.
Note
To make sure that your announcements are accessible, if you use headings inside an announcement, make sure that you use only level 6 headings (
<h6>). The structure of the course Course page uses heading levels 1-5.If you copy text from another source and paste it into the text editor, proofread the result carefully. Some applications automatically change quotation marks and apostrophes from the “straight” version to the “smart” or “curly” version. The editor requires “straight” quotation marks and apostrophes.
Specify a date for this update. By default, today’s date is already entered. You can change the date using the calendar tool, or by entering some other valid date.
Note
Learners do not see the update on the Course page unless it has the latest chronological date of all existing updates.
Select Post.
Your new update becomes available to learners immediately. If the update has the latest chronological date, it is shown to learners on the Course page, otherwise the update appears on the Updates page.
- Optionally, choose whether to send a notification about your update to the edX mobile app.
- Learners can choose to turn off notifications for individual courses or for all courses. The Course page continues to show updates.
- Updates appear on the Course page, even if you do not send notifications.
11.2.2. Add a Course Handout
To add a course handout, you upload a file in Studio, then add an entry to an HTML-formatted list of handouts, specifying the URL to your uploaded file and providing a handout title.
You can open the Studio Files & Uploads page in another browser window to make this process easier.
To add a course handout, follow these steps.
In Studio, select Updates from the Content menu.
On the Updates page, you see a Course Updates panel and a Course Handouts panel.
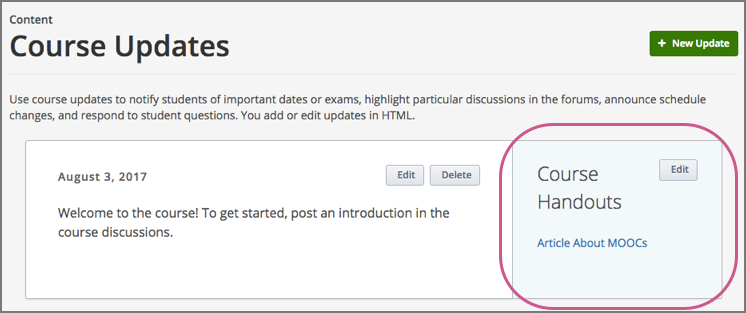
In the Course Handouts panel, select Edit.
In the editor that opens, use HTML formatting to add a link to your uploaded file and a title for the handout. If there are no existing handouts, by default an empty ordered list tag is provided.
An example using paragraph tags rather than a list, follows.
<p><a href="/static/Syllabus_Fall2017.pdf" target="_blank">Syllabus</a></p>
<p><a href="/static/Glossary_v3.pdf" target="_blank">Glossary</a></p>
Select Save.