10.27. Oppia Exploration Tool#
Note
EdX offers provisional support for this tool.
Oppia is a third-party tool that you can use to create short interactive tutorials, called explorations. This topic describes how to embed Oppia explorations in your course.
Before you make content from an external site available through your course, be sure to review the content to ensure that it is accessible to people with disabilities. For more information, see Accessibility Best Practices for Developing Course Content.
10.27.1. Overview#
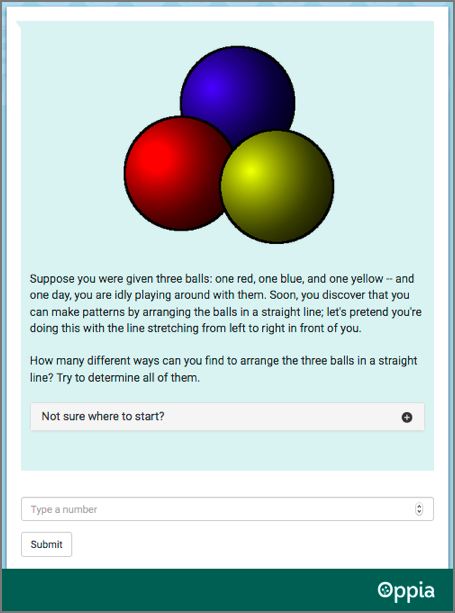
You use the Oppia exploration tool in Studio to add interactive tutoring activities, created as Oppia explorations, to your course. Oppia explorations simulate conversations with human tutors to encourage exploration and experiential learning.
Note
Oppia explorations are not assessments that can be graded. At this time, you should not add Oppia exploration components to the graded subsections of your course.
The following example shows an Oppia exploration as learners see it in the edX LMS.
For information about how to create Oppia explorations, see the Oppia User Documentation.
10.27.2. Enable the Oppia Exploration Tool#
Before you can add an Oppia exploration to your course, you must enable this tool in Studio.
To enable the Oppia exploration tool in Studio, you add the "oppia" key to
the Advanced Module List on the Advanced Settings page. (Be sure to
include the quotation marks around the key value.) For more information, see
Enabling Additional Exercises and Tools.
10.27.3. Add an Oppia Exploration in Studio#
You must enable the Oppia exploration tool before you add a component with an exploration to your course. You must also select the Oppia exploration that you want to add, and obtain both the URL of the website that hosts that exploration and its ID.
On the Course Outline page, open the unit in an ungraded subsection where you want to add the exploration.
Under Add New Component, select Advanced, and then select Oppia Exploration. The new component is added to the unit.
In the new component, select Edit.
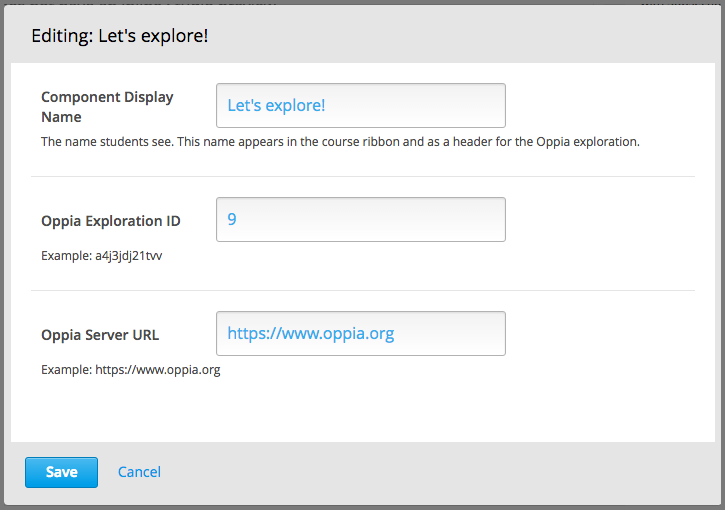
In the Component Display Name field, enter an identifying name for the component. In the LMS, this name appears as a heading above the exploration.
In the Oppia Exploration ID field, enter the identifier assigned to the exploration you want to add. For example,
qG6kclSxlWZnorgC4_ggkWar-L.In the Oppia Server URL field, enter the host site of the exploration you want to add. For example,
www.oppia.org.Select Save.
Studio does not show the exploration on the unit page. To verify your work, select Preview, or publish the unit and then select View Live.