7.35. Recommender
The Recommender provides students with a list of online resources related to the course content. These resources are jointly managed by course team members and the students.
The most common use is for remediation of errors and misconceptions, followed by providing additional, more advanced resources.
For example, if a student is working through a physics problem, the Recommender may show links to concepts used in the problem on Wikipedia, PhET, and OpenStax, as well as in the course itself. The Recommender can help fill complex knowledge gaps, as well as help to move students in the right direction.
Students and course team members can:
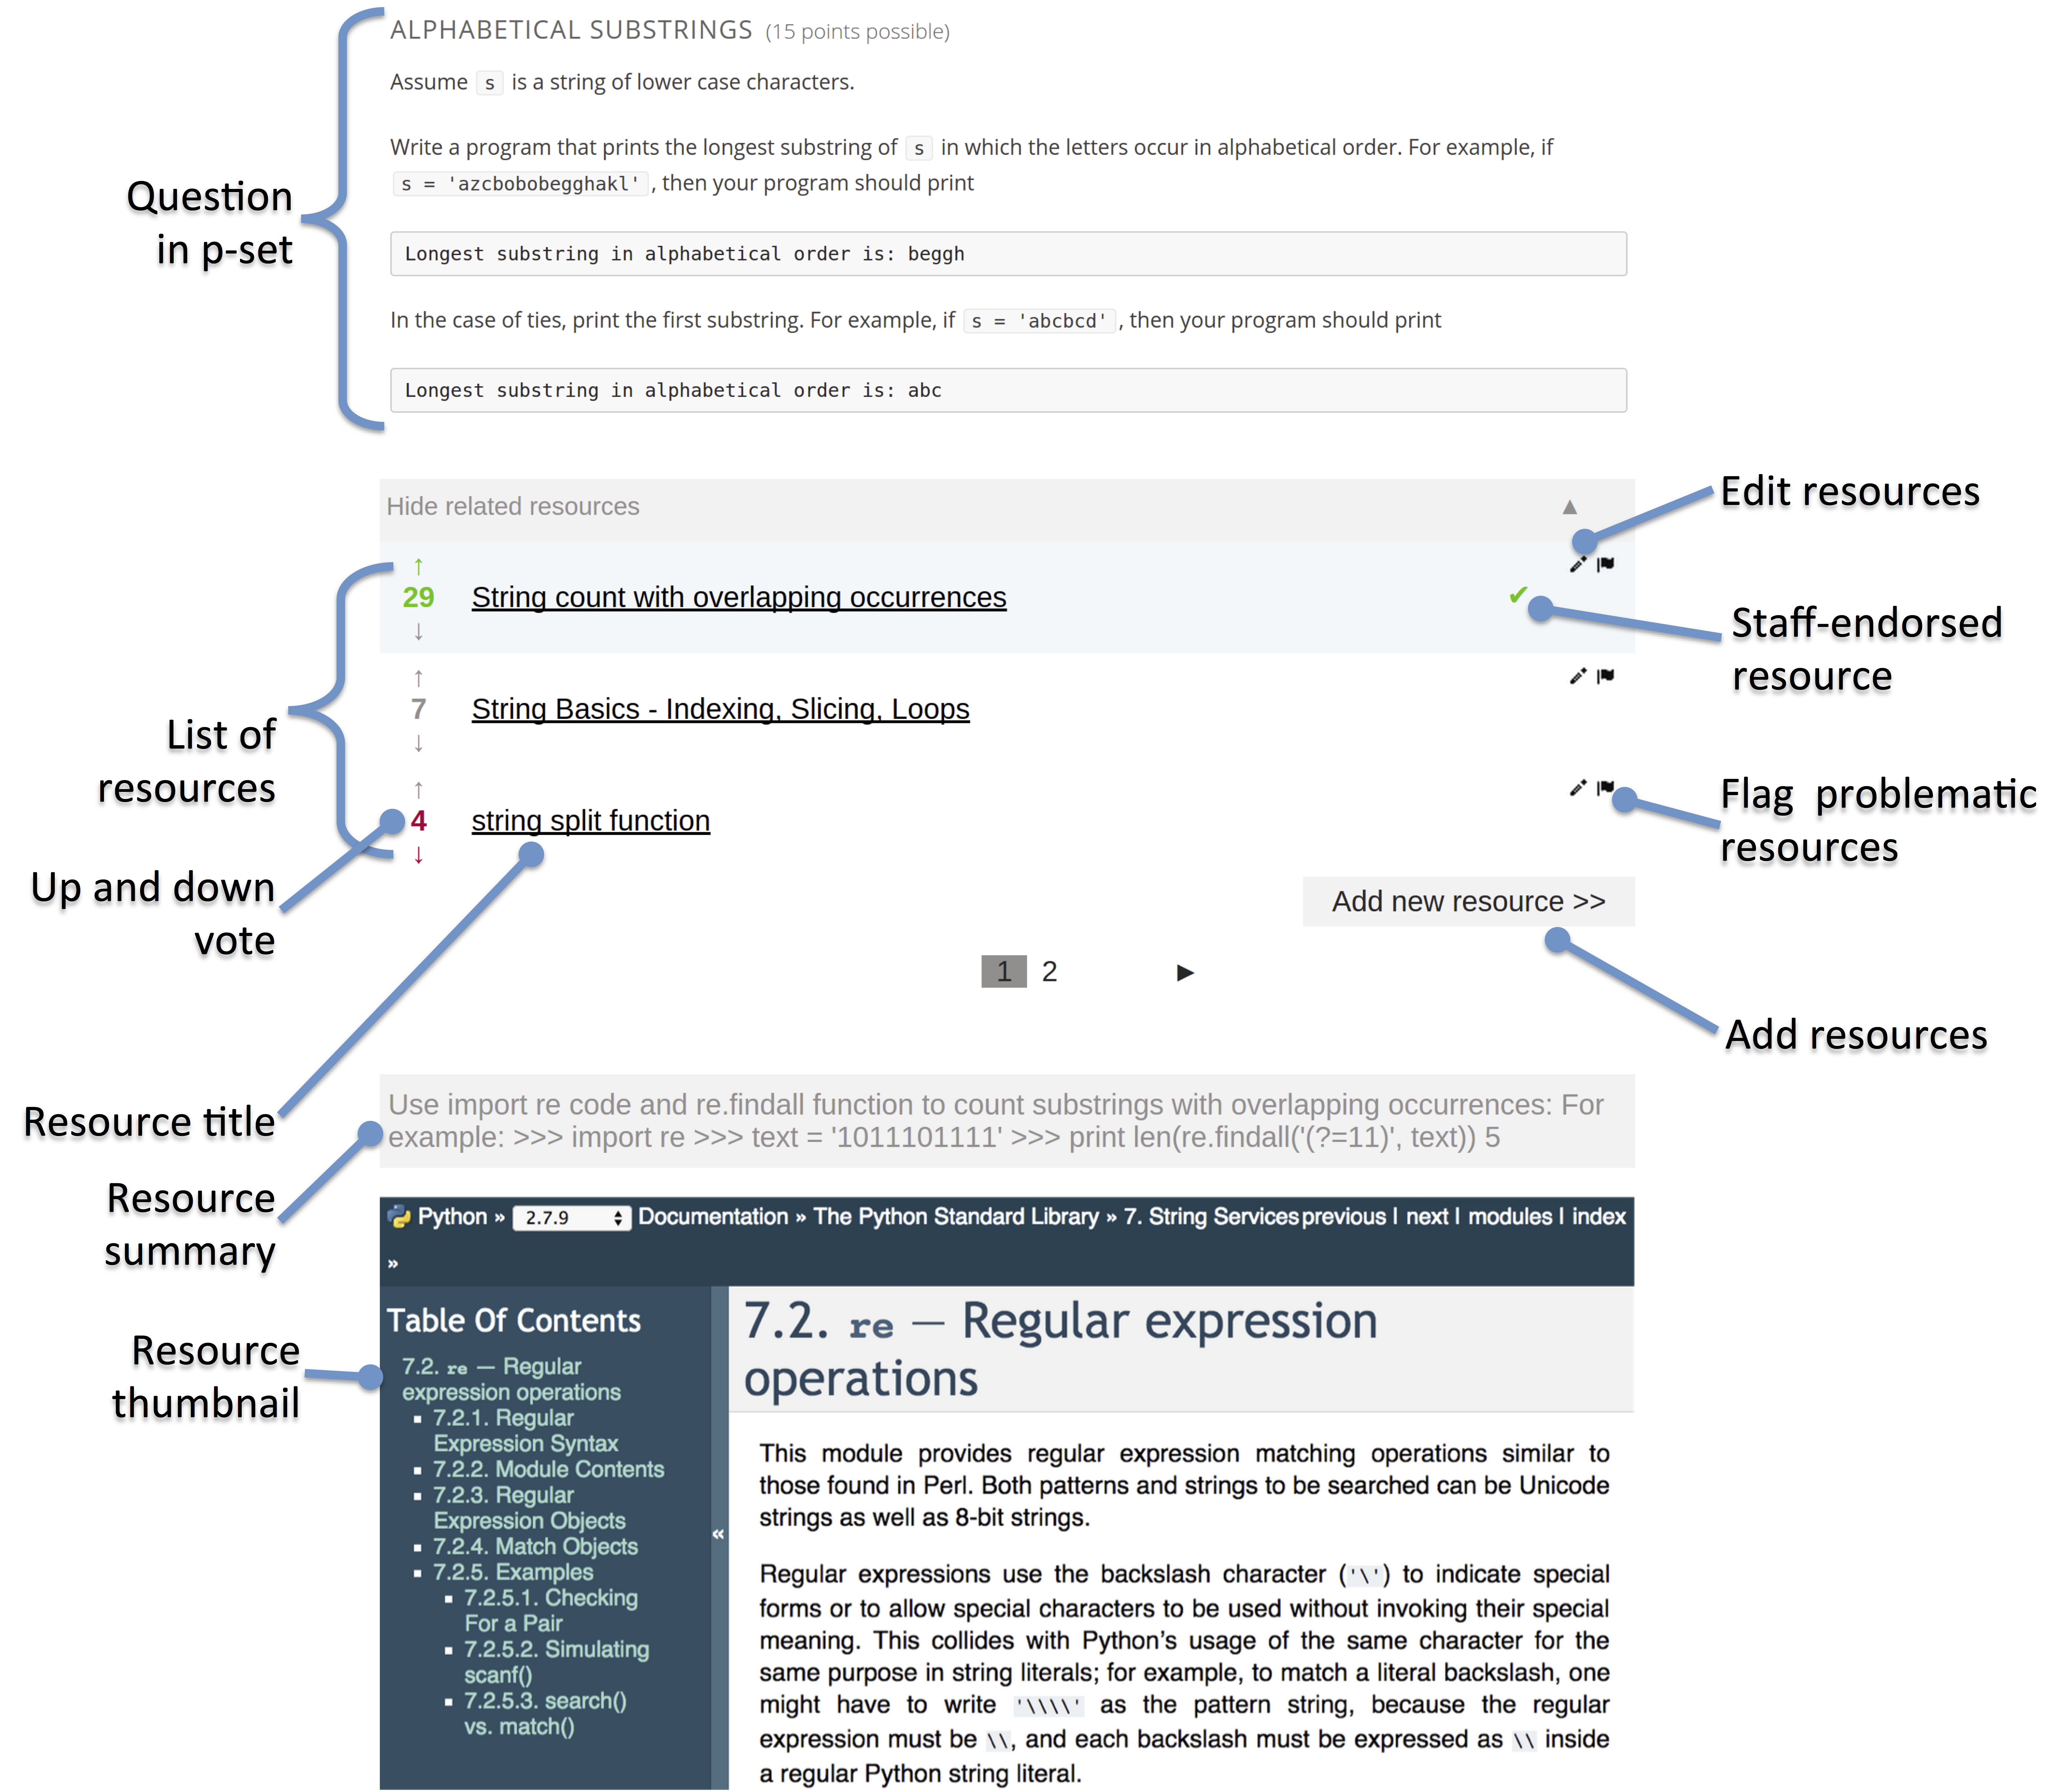
- Add new resources.
- Edit existing resources and work jointly to improve the quality of resources (e.g., give an informative resource summary).
- Manage quality by voting for high quality resources or flagging resources as spam or abuse.
Course team members can endorse useful resources or remove irrelevant entries.
If you use the Recommender, you should inform students through course content or course updates about the tool.
Following is an example of a Recommender in a course. The upper part of the figure illustrates a question in problem set where the Recommender is attached. The middle of the figure shows a list of resources and several gadgets for users to work on the resources. The bottom portion shows additional information about a given resource on mouse-over event.
7.35.1. Add a Recommender
To add a Recommender to a course:
Add the Recommender advanced component.
- On the Settings menu, click Advanced Settings.
#. Make sure that recommender is in the field for the Advanced Module List policy key. For example, if you have no other advanced module, this field should be:
["recommender"]At the bottom of the page, click Save Changes.
The page refreshes automatically. At the top of the page, you should see a notification that your changes have been saved.
Go to the unit in the course outline where you want to add the RecommenderXBlock.
Under Add New Component, select Advanced.
Select recommender.
Optionally, in the component that appears, select Edit. Then, in the component editor, specify settings as needed.
- Whether to take users on an introduction tour when they see the tool the first time. If selected, the first time (and only the first time) a user sees the RecommenderXBlock, there will be a short guided tutorial.
- Whether to disable the user interface functions which are under development. Because these are untested and under development, please leave these disabled unless otherwise advised by edX staff.
- How many resources do you want to show in each page of the resource list.
- How many page icons do you want to show in the pagination control (that is, the page range)? The icons for pages from (current page - page range) to (current page + page range) will be shown.
Click Save.
Optionally, open the unit in the LMS and suggest some resources.