5.8. Re-running a Course
Another way to create a course in Studio is to re-run an existing course. When you select the course re-run option, most, but not all, of the original course content is duplicated to the new course. The original course is not changed in any way.
| Type of Content | Duplicated to New Course? |
|---|---|
| Course start date | No. Set to midnight on January 1, 2030 (UTC). |
| All other course dates | Yes. You will need to update all release dates and due dates. |
| Course structure (sections, subsections, units) and state (published, hidden) | Yes. |
| Individual problems and other components | Yes. |
| Files uploaded to the course, including videos and textbooks | Yes. |
| Pages added to the course | Yes, including all page content and the defined page order. |
| Course Updates | Yes. |
| Advanced Settings | Yes. |
| Grading policy | Yes. |
| Student enrollment data | No. |
| Course team privileges, including admins, discussion moderators, beta testers | No. Only the user who created the new course has access to it. |
| Manually created cohort groups | No. |
| Student answers, progress, and grading data | No. |
| Certificates | No. |
| Discussion posts, responses, comments, and other data | No. |
| Wiki contributions | No. |
See Use Re-Run to Create a Course and Update the New Course.
5.8.1. Use Re-Run to Create a Course
Before you re-run a course:
- For a course that is hosted on the edge.edx.org site, verify that you have permission to create courses in Studio. See Use Studio on Edge.
- For a course that is hosted on the edx.org site, contact your Program Manager. Your Program Manager will create the new course using the re-run feature, and then work with you to complete the steps to update the new course.
To re-run a course, you must have course creation privileges in Studio and you must be a member of the course team for the course you want to re-run.
To re-run a course:
- Log in to Studio. Your dashboard lists the courses that you have access to as a staff member.
- Move your cursor over each row in the list of courses. The Re-Run Course and View Live options appear for each course.
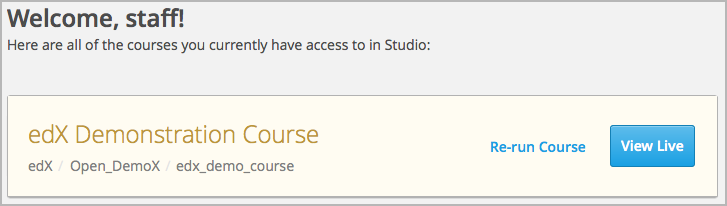
- Locate the course you want to re-run and click Re-Run Course. The Create a re-run of a course page opens with values already supplied in the Course Name, Organization, and Course Number fields.
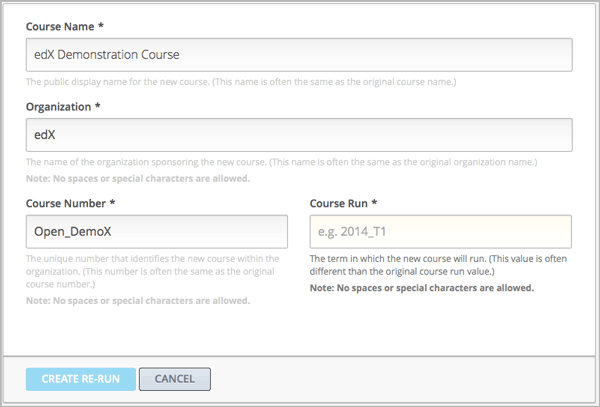
Supply a Course Run to indicate when the new course will be offered.
Together, the course number, the organization, and the course run are used to create the URL for the new course. The combination of these three values must be unique for the new course. In addition, the total number of characters used for the name, organization, number, and run must be 65 or fewer.
Click Create Re-Run. Your My Courses dashboard opens with a status message about the course creation process.
Duplication of the course structure and content takes several minutes. You can work in other parts of Studio or in the LMS, or on other web sites, while the process runs. The new course appears on your My Courses dashboard in Studio when configuration is complete.
5.8.2. Update the New Course
When you create a course by re-running another course, you should carefully review the settings and content of the new course. To assure a quality experience for students, be sure to test the course thoroughly before the course start date. See Testing Your Course Content and Beta Testing a Course.
At a minimum, you will need to make these changes to prepare the new course for release:
Add course staff members, including discussion admins, moderators, and community TAs. See Add Course Team Members or Staffing.
Update course-wide dates, including course and enrollment start and end dates. See Set Important Dates for Your Course.
Change the release dates of course sections, subsections, and units. See Release Dates.
Change the due dates of subsections that are part of your grading policy. See Set the Assignment Type and Due Date for a Subsection.
Delete or edit posts on the Course Updates page in Studio. See Add a Course Update.
Review the files on the Files & Uploads page. To update a file that contains references to course-related dates, you will need to:
- Locate the source file.
- Change course-related dates in the file.
- Upload the revised version of the file.
Note
If you use the same file name when you upload a revised file, links to that file in course components and course handouts will continue to work correctly. If you rename a file and then upload it, you must also update all links to the original file name. See Add Course Handouts or Add a Link to a File.
Review the staff biographies and other information on the course summary page and make needed updates. See Providing a Course Overview.
Create initial posts for discussion topics and an “introduce yourself” post. See Managing Course Discussions.
Add initial wiki articles.
You can use the course checklists to work through the course and verify that it is ready for release. You can also refer to the Course Launching Activities chapter for tools and ideas that help you prepare the course for launch.