6.5. Developing Course Units
When working with units in the course outline, ensure you understand the following:
- What is a Unit?
- Viewing Units in the Outline
- Viewing the Unit Page
- Viewing Units as a Student
- Unit Publishing Status and Visibility to Students
- Unit Publishing Status
When developing your course, you perform the following tasks with units:
- Create a Unit
- Edit a Unit
- Preview a Unit
- Publish a Unit
- Discard Changes to a Unit
- View a Published Unit
- Hide a Unit from Students
- Delete a Unit
You add content to units with course components.
6.5.1. What is a Unit?
A unit is a part of a subsection that students view as a single page.
A unit contains one or more components, such as HTML content, problems, discussions, and videos.
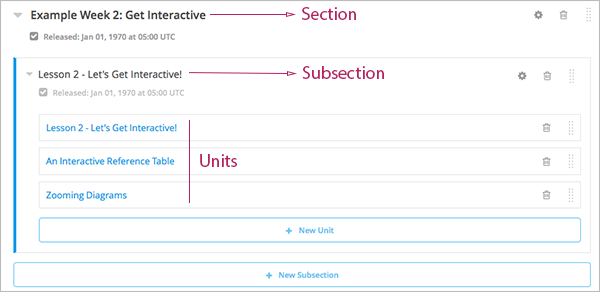
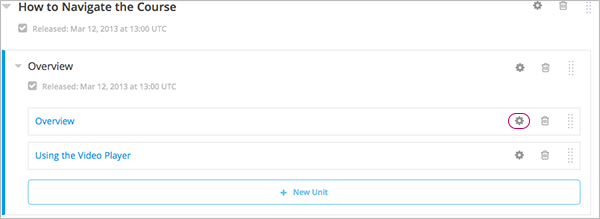
6.5.2. Viewing Units in the Outline
To view units in the outline, you expand the parent section and subsection:
6.5.3. Viewing the Unit Page
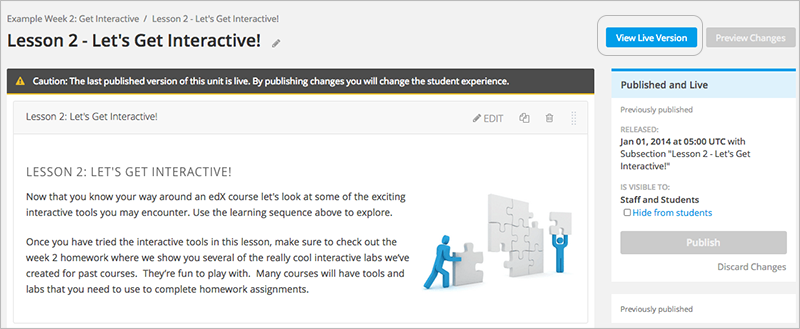
When you click on a unit name in the outline, the Unit page opens.
The following example shows a unit page with two components, with circles and text to show different areas and controls in the page.

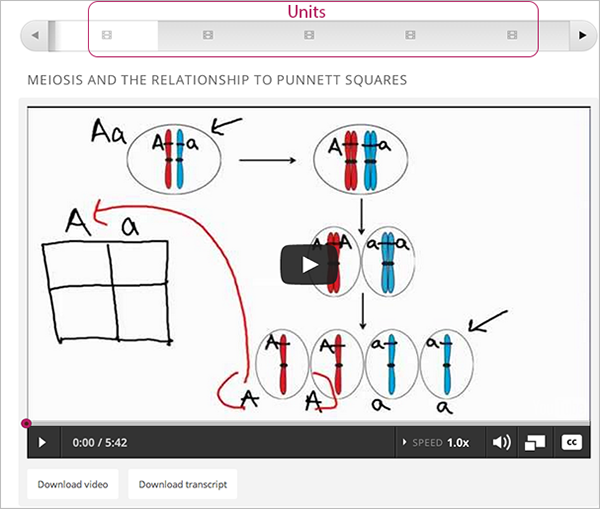
6.5.4. Viewing Units as a Student
To a student using the edX Learning Management System, each unit in the subsection appears as a link on the course ribbon at the top of the page. The active unit is open beneath the course ribbon.
The following image shows a subsection that has five units, which are circled in the ribbon above the video, with the first unit open:
6.5.5. The Unit Workflow
When you have set up the section and subsection in the course outline, you then work with units.
The typical workflow is:
After you publish the unit, you can:
The following diagram shows the typical unit development workflow:

As you work through these steps, the publishing status of the unit changes. The publishing status controls the content available to students, along with release dates. See the next section for more information.
6.5.6. Unit Publishing Status and Visibility to Students
The following information summarizes whether or not students can see a unit.
- Students never see a unit with the publishing status Draft (Never Published).
- Students never see a unit with the publishing status Visible to Staff Only. See Hide a Unit from Students for more information.
- Students do not see a unit with the publishing status Published Not Yet Released until the release date. On the release date, the status changes to Published and Live.
- If the publishing status is Published and Live, students see the current version of the unit.
- If the publishing status is Draft (Unpublished Changes), students see the last published version of the unit if the release date for the containing section and subsection has passed.
For more information, see Controlling Content Visibility.
6.5.7. Unit Publishing Status
As an course author, you work with units with the following statuses:
- Draft (Never published)
- Published and Live
- Published (not yet released)
- Draft (Unpublished changes)
- Visible to Staff Only
6.5.7.1. Draft (Never published)
When you create a new unit and add components to it, the unit’s publishing status is Draft (Never Published), as shown in the status panel:
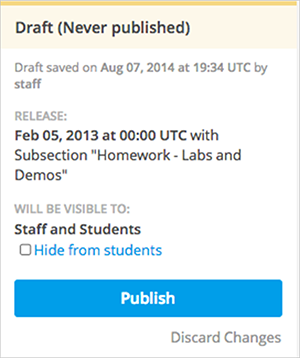
In Studio, you see the version of the content that you’re working on. Students never see a unit with this status, even if the release date has passed.
Though you do not see the unit in the LMS, you can preview the unit.
You must publish the unit for it to be included in the LMS.
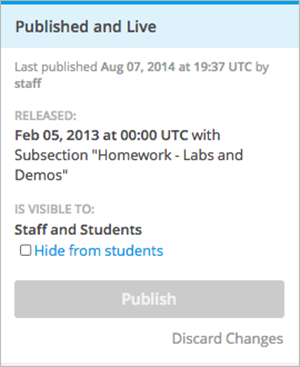
6.5.7.2. Published and Live
The release date for the section and subsection have passed. You’ve published the unit and haven’t made any changes to it. You and students both see the current version of the unit.
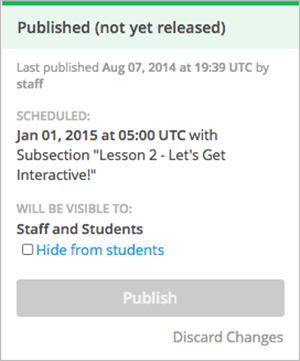
6.5.7.3. Published (not yet released)
You’ve published the unit, but the release date hasn’t passed. Students cannot see this unit until the release date passes.
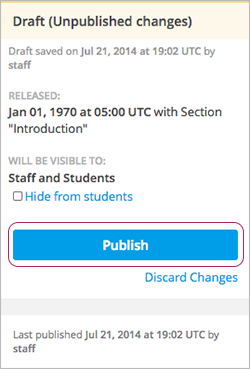
6.5.7.4. Draft (Unpublished changes)
When you edit a published unit, whether or not it is released, the unit’s publishing status changes to Draft (Unpublished Changes), as shown in the status panel:
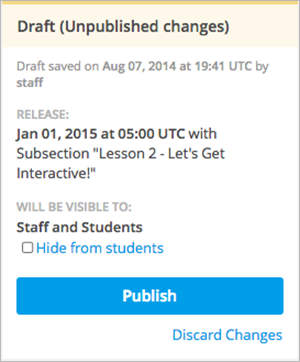
In Studio, you see the draft of the content that you’re working on. If the release date has passed, students see the last published version of the unit. If the release date hasn’t passed, students can’t see your content.
You must publish the unit for students to see your changes.
You can preview the changes to a unit to test how your changes will appear to students after you publish the unit.
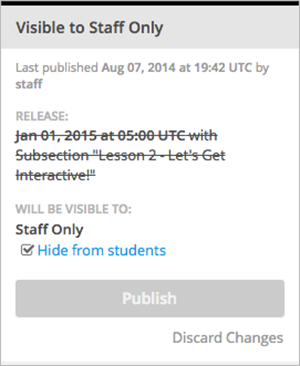
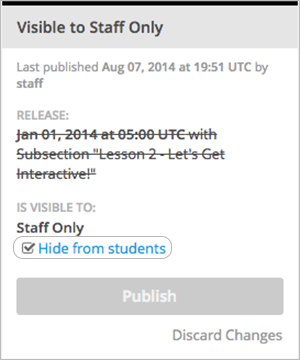
6.5.7.5. Visible to Staff Only
When you hide a unit from students, the unit’s publishing status changes to Visible to Staff Only.
The publishing status of a unit can be Visible to Staff Only if you hid the parent section or subsection from students.
Students never see a unit with this status, even if it has been published and the release date has passed.
6.5.8. Create a Unit
You can create a unit from the outline or create a unit in the same subsection from the unit page.
To create a unit from the outline:
- In the outline, expand the subsection in which you want to create a new unit.
- Click New Unit at the bottom of the expanded subsection. A new unit is added at the end of the subsection.
- On the unit page, the unit name is selected. Edit the name as needed.
- Add components to the new unit as needed.
To create a new unit from a unit page:
In the Unit Location panel, click New Unit.
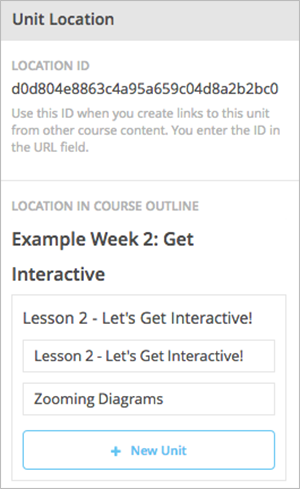
The unit page for the new unit opens automatically.
On the unit page, the unit name is selected. Edit the name as needed.
Add components to the new unit as needed.
You must then publish the unit to make it visible to students.
6.5.9. Edit a Unit
You can edit a unit in the following ways:
When you make any of these changes, if you previously published the unit, the state changes to Draft (Unpublished Changes). You must then publish the unit to make your edits visible to students.
6.5.9.1. Edit the Unit Name
To edit a unit name, hover over the name to show the Edit icon:
Click the Edit icon next to the unit name. The name field becomes editable. Enter the new name and tab or click out of the field to save the name.
6.5.9.2. Reorganize Components in Units
You can reorganize components within a unit by dragging and dropping them to new locations.
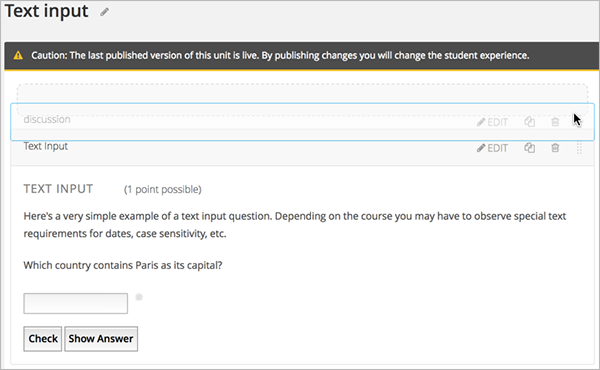
To move a component, hover over the handle on the right of the component’s box until the cursor changes to a four-headed arrow. For example, in the image below, the handle for the discussion component is selected:
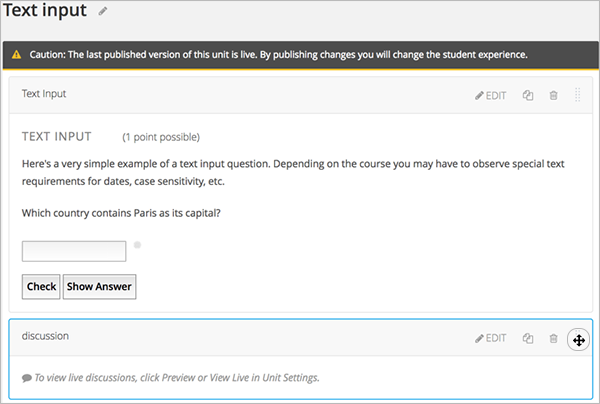
Then, click and drag the component to the location that you want.
A dashed outline indicates where the component will land when you release the mouse button. For example, in the image below, the discussion component is being moved to the top of the unit:
6.5.10. Preview a Unit
You preview a unit to review and test the content before it is visible to students.
You can preview a unit before it is published and when there are unpublished changes. When the unit is published and there are no pending changes, you cannot preview the unit; you must view the live version of the unit.
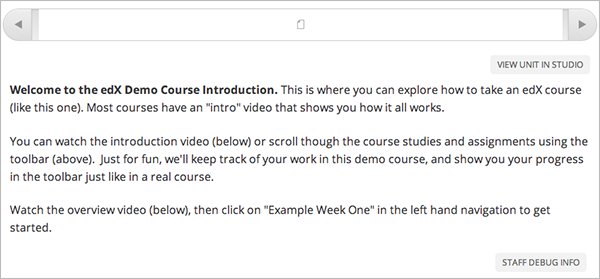
To preview the unit, in the unit page, click Preview Changes.
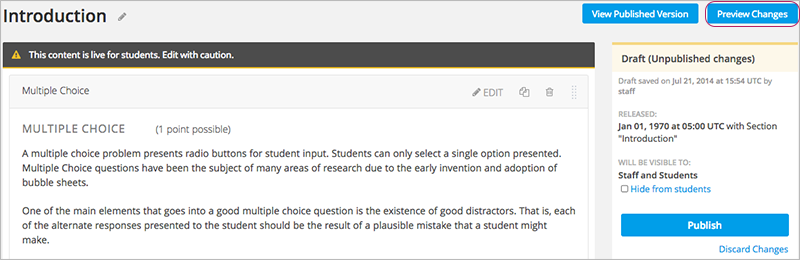
The unit opens in preview mode:
When you are revising a previously published unit, it is helpful to preview your changes in one window and view the published unit in a second window.
6.5.11. Publish a Unit
Publishing a unit makes the current version of the unit in Studio available to students, if the release date for the section and subsection have passed.
You publish a unit that has a status of Draft (Never Published) or Draft (Unpublished Changes). When you publish a unit, the status changes to Published and Live or Published Not Yet Released.
You can publish a unit from the unit page or the course outline.
6.5.11.1. Use the Unit Page to Publish a Unit
To publish the unit, click Publish in the status panel:
6.5.11.2. Use the Outline to Publish a Unit
To publish a unit from the outline, click the publish icon in the box for the unit:
Note
The publish icon only appears when there is new or changed content in the unit.
6.5.12. Discard Changes to a Unit
When you modify a published unit, your changes are saved in Studio, though the changes aren’t visible to students until you publish the unit again.
In certain situations, you may decide that you never want to publish your changes. You can discard the changes so that Studio reverts to the last published version of the unit.
To discard changes and revert the Studio version of the unit to the last published version, click Discard Changes in the status panel:

Caution
When you discard changes to a unit, the changes are permanently deleted. You cannot retrieve discarded changes or undo the action.
6.5.13. View a Published Unit
To view the last published version of a unit in the LMS, click View Published Version.
The unit page opens in the LMS in Staff view. You may be prompted to log in to the LMS.
If the unit status is Draft (Unpublished Changes), you do not see your changes in the LMS until you publish the unit again.
If the unit status is Draft (Never Published), the View Published Version button is not enabled.
6.5.14. Hide a Unit from Students
You can prevent students from seeing a unit regardless of the unit status or the release schedules of the section and subsection.
For more information, see Controlling Content Visibility.
You can hide a unit from students using the course outline or the unit page.
6.5.14.1. Use the Unit Page to Hide a Unit
Select the Hide from students checkbox in the status panel:
For more information, see Controlling Content Visibility.
6.5.14.2. Use the Outline to Hide a Unit
Click the Settings icon in the unit box:
The Settings dialog box opens.
Check Hide from students.
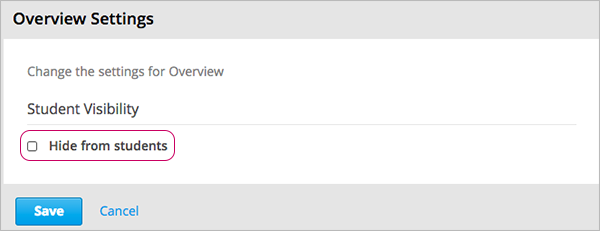
Click Save.
6.5.15. Delete a Unit
You delete a unit from the course outline.
When you delete a unit, you delete all components within the unit.
Warning
You cannot restore course content after you delete it. To ensure you do not delete content you may need later, you can move any unused content to a section in you
To delete a unit:
- Click the delete icon in the box for the unit you want to delete:

- When you receive the confirmation prompt, click Yes, delete this unit.