10.3. Creating Cohort-Specific Courseware
If you have cohorts enabled in your course, you can create different course experiences for students in different cohorts.
You can design your course so that some students are given different content than others. You do this by creating content groups in Studio, and designating specific components in your course as visible only to one or more content groups. Then, if you associate one or more cohorts with a content group, only the students in cohorts associated with that content group can see course content that you have designated for it.
For more details about content groups, see Content Groups. For an example of cohort-specific course content, see Example: Cohort-Specific Courseware.
Complete these steps to create cohort-specific content in your course.
In Studio:
- Enable cohorts in your course.
- Create content groups.
- Specify components in courseware as visible only to particular content groups.
In the LMS:
- Assign students to cohorts.
- Associate one or more cohorts with a content group.
- Preview cohort-specific courseware.
10.3.1. Example: Cohort-Specific Courseware
Suppose that you create two cohorts in your course: University Alumni and Current University Students. Students who are not in either of these cohorts are automatically placed into a third cohort, the default cohort, when they access the courseware or discussion tabs in the course. For more information about enabling cohorts in your course and assigning students to cohorts, see Enabling and Configuring the Cohorts Feature.
You intend all students to have substantially the same course experience, with the exception that only students in the two university-related cohorts will receive content that is specific to your university and therefore only of interest to them.
At the end of every section, you intend to include a video message from various university officials, including the university president and the dean of your college. These videos will be shown only to students in the university and alumni cohorts. Also at the end of each section, you intend to include a quiz to test knowledge of the concepts taught in that section. The quiz will be shown to all students enrolled in the course.
To achieve this, on the Group Configurations page in Studio you create one content group called “University-Specific Content”. In the Instructor Dashboard, on the Membership tab, you associate both the “University Alumni” and the “Current University Students” cohorts with the “University-Specific Content” content group.
Then, in your course outline, you change the visibility settings for the video component at the end of each section so that it is visible only to the “University-Specific Content” content group. You do not need to edit the visibility settings of the quiz component, because if no content group is specified in a component’s visibility settings, it is visible to all students.
As a final step, you preview the course in the LMS to ensure that students see the content that is intended for them. You confirm that when you view the course in the role of Student (in other words, any student not in a content group), you see a quiz at the end of each section, but do not see the university-related videos. When you view the course as a student in the “University-Specific Content” group, you see a university-related video as well as the quiz at the end of each section.
10.3.2. Content Groups
Content groups are virtual groupings of students who will see a particular set of course content. You can use content groups to designate specific course content as visible to particular cohorts of students.
You create content groups in Studio, and in your course outline you use the Visibility Settings to designate whether a component is selectively visible only to one or more content groups. Any course components that do not have an explicitly restricted visibility setting remain visible to all students, regardless of their cohort.
Content groups do not have an actual impact on the visibility of a course component until you associate them with one or more cohorts. If you have designated certain course content as visible to a content group, and in addition have associated that content group with one or more cohorts, then those cohorts will see the designated content.
For an example of using content groups to create cohort-specific courseware, see Example: Cohort-Specific Courseware.
10.3.3. Create Content Groups
- In Studio, select Settings, then select Group Configurations.
- On the Group Configurations page, click New content group.
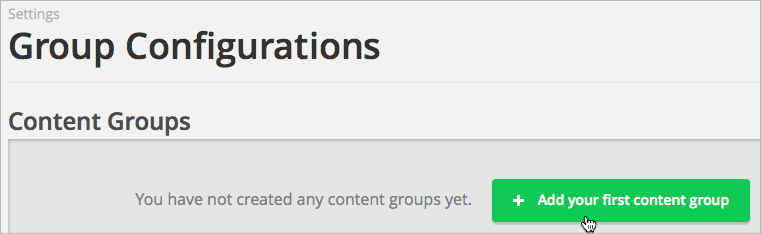
- Enter a meaningful name for the content group, then click Create. The page refreshes to show the name of your new content group.
- Repeat this step to create as many content groups as you want.
After you create a content group, you can work with your course outline to specify which components are visible to specific content groups. For details, see Specify Components in Courseware as Visible Only to Particular Content Groups.
On the Instructor Dashboard, you associate each content group with one or more cohorts. For details, see Associate Cohorts with Content Groups.
Note
Once a content group is created, you cannot delete it. You can remove the association between a content group and its cohorts by changing the association to Not Selected.
10.3.4. Specify Components in Courseware as Visible Only to Particular Content Groups
After you create at least one content group, you can edit your course in Studio and modify the visibility settings of components that you want to make visible only to particular content groups.
Note
You do not need to edit the visibility settings of components that are intended for all students. Components that you do not explicitly indicate as visible to a group are visible to all students enrolled in your course, regardless of the cohort that they belong to.
You can specify content as visible to content groups only at the component level in a unit. You cannot specify entire units, subsections, or sections for visibility to content groups.
In a separate task, you create cohorts and associate content groups with cohorts. Then, only the cohorts associated with content groups which you selected in a component’s visibility settings can view the component. See Associate Cohorts with Content Groups for details about associating cohorts with content groups.
To specify components as visible only to particular content groups, follow these steps.
- In Studio, select Content, then select Outline.
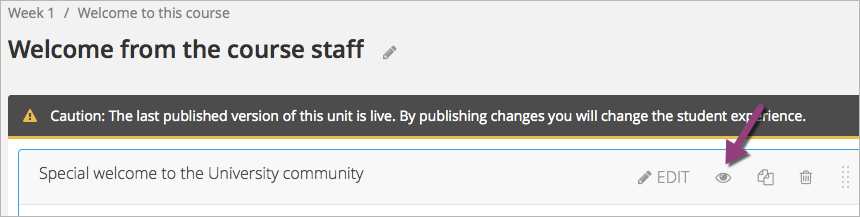
- For each component that you want to make visible only to a particular content group or groups, click the unit name, then click the Visibility Settings icon.
- In the Editing visibility dialog, select Specific Content Groups, then select the checkbox for each content group for which you want the current component to be visible.
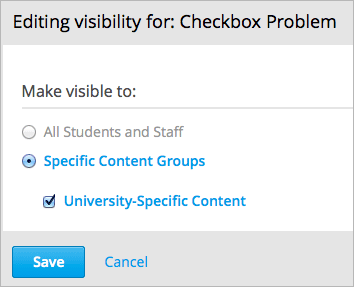
- Click Save.
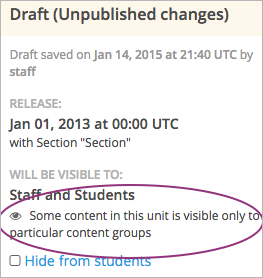
The Visibility Settings icon for the component is now black, and the publishing details for the course section in the sidebar refresh to indicate that some content is visible only to particular groups.

For details about previewing your course to ensure that students in a cohort correctly see the content intended for them, see Preview Cohort-Specific Courseware.
Note
In addition to visibility settings for content groups, a student’s ability to see a course component also depends on whether it is hidden from students, whether the unit is published, and the course’s release date. For details about previewing courseware in general, see Preview Course Content.
10.3.5. Associate Cohorts with Content Groups
After you create a content group, you can associate it with one or more cohorts with which you want to share the same special content in your course.
Note
A content group can be associated with more than one cohort; a cohort cannot be associated with more than one content group.
To associate a cohort with a content group, follow these steps:
- In the LMS, select Instructor, then select Membership.
- Scroll to the Cohort Management section at the bottom.
- From the drop down list, select the cohort to which you want to associate your content group.
- Click the Settings tab for the selected cohort.
- Under Associated Content Group, choose the Select a Content Group option.
- From the drop down list, select the content group that you want your cohort to be associated with.
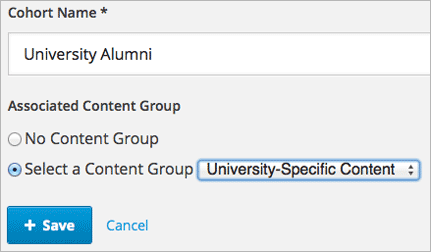
Click Save.
You have now associated your content group with a cohort. Any course content that you designate as visible to that content group is visible to students in the associated cohort or cohorts.
You can associate additional cohorts with the same or a different content group by repeating steps 3 to 7.
For an example of using content groups to create cohort-specific courseware, see Example: Cohort-Specific Courseware.
10.3.6. Preview Cohort-Specific Courseware
After you designate components in your course as being visible only to certain content groups, you can preview your courseware to ensure that each group correctly sees the content intended for them.
Note
In addition to visibility settings for content groups, a student’s ability to see a course component also depends on whether it is hidden from students, whether the unit is published, and the course’s release date. For details about previewing courseware in general, see Preview Course Content.
You can view the course as a member of these groups:
| Role | When You “View As” This Role |
|---|---|
| Staff | You see all content in the course, including content that is hidden from students. |
| Student | You see any content that is intended for all students. |
| Student in <Content Group Name> | You see content that is intended for all students, as well as any content specifically set to be visible to this content group. |
- In Studio, in the course outline, click Preview Changes. You see your course section in the Courseware section of the LMS.
- In the navigation bar at the top of the page, select one of the options in the View this course as drop down list, as described in the table above.

The course view refreshes and the content is presented as a member of the selected content group would see it.
After your course is live, you can also see the live version as a student would see it, by clicking View Live from Studio. For more information, see View Your Live Course.