5.2. Providing a Course Overview
5.2.1. Overview
Prospective students need to know specific information about your course, including what the course covers, how much time they should plan to spend on the course each week, and whether the course requires any prior skills and knowledge. You specify all of this information in Studio.
For more information, see the following topics:
- Describe Your Course
- Add a Course Image
- Add a Course Introduction Video
- Set Course Time Requirements
- Set Course Prerequisites
- Set Important Dates for Your Course
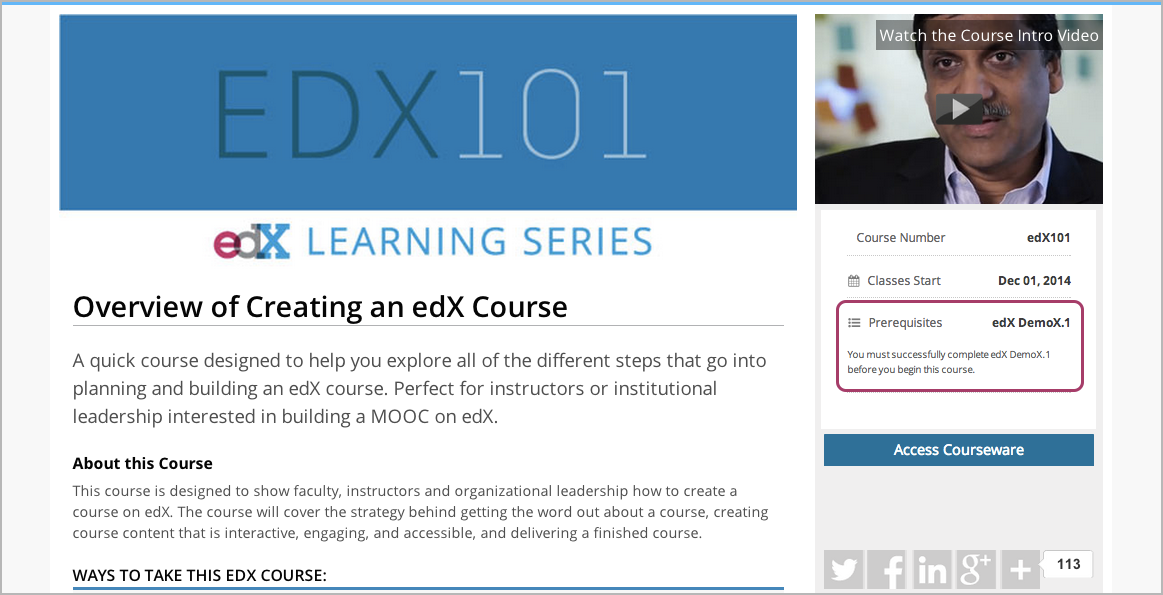
Most of this information appears on the course About page, sometimes called the course summary page. The following image shows a typical About page.
Students see the course About page before they enroll in the course. After a student enrolls in the course, students can see information about your course on the Student Dashboard.

Note
If your course will be available on edX.org, you must work with your edX program manager to prepare the content for your About page, including the course overview, image, and video. For more information, see the About page lesson in edX101.
5.2.2. Describe Your Course
You describe your course in a course overview. The overview contains important information for students who may be interested in taking your course. It introduces the main idea of the course and describes the topics or concepts that the course covers. The overview can also describe the skills and knowledge your students need to be able to succeed in your course, as well as provide information about course requirements and staff.
The course overview is outlined in the following course About page.

You use HTML to enter the course overview in Studio. The Course Overview field in Studio contains a boilerplate that includes placeholders.
To enter the course overview, follow these steps.
- From the Settings menu, select Schedule & Details.
- Scroll down to the Introducing Your Course section, then locate the Course Overview field.
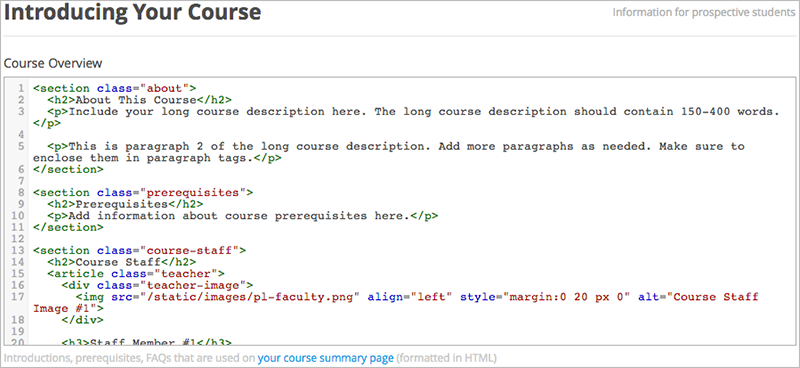
Replace the placeholders in the boilerplate text to create your course overview. Studio automatically saves your changes.
Note
Do not edit HTML tags in the boilerplate. These tags align the content on the course About page.
Below the Course Overview field, click your course summary page to see how the description will appear to students. A sample About page opens in a new window.
When you make changes, note that you may have to wait a moment for the content to auto-save before the changes appear on the page.
5.2.3. Add a Course Image
You provide a course image that identifies your course. The course image that you add in Studio appears on the student dashboard. On Edge, the course image also appears on the course About page.
The course image must be a minimum of 660 pixels in width by 240 pixels in height, and in .jpg or .png format.
To add a course image, follow these steps.
- From the Settings menu, select Schedule & Details.
- Scroll down to the Course Image section.
- To select an image from your computer, click Upload Course Image, then follow the prompts to find and upload your image.
- View your dashboard to see how the image will appear to students.
5.2.4. Add a Course Introduction Video
To excite and entice potential students to enroll, each course can have a course introduction video. The video should reveal some of the personality the instructors bring to the course.

The video should answer these key questions.
- Who is teaching the course?
- What university or college is the course affiliated with?
- What topics and concepts does your course cover?
- Why should a learner enroll in your course?
The video should deliver your message as concisely as possible and have a run time of less than 2 minutes.
Ensure your course introduction video follows the same Compression Specifications and Video Formats guidelines as course content videos.
To add a course introduction video:
- Upload the course video to YouTube. Make note of the code that appears between watch?v = and &feature in the URL. This code appears in the box below.
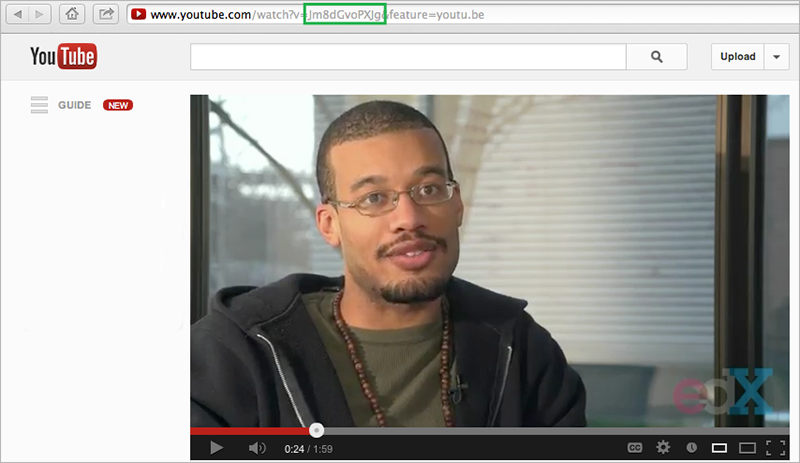
- From the Settings menu, select Schedule & Details.
- Scroll down to the Course Introduction Video section.
- In the field below the video box, enter the YouTube video ID (the code you copied in step 1). When you add the code, the video automatically loads in the video box. Studio automatically saves your changes.
5.2.5. Set Course Time Requirements
To specify the number of hours that you expect students to spend on the course each week, follow these steps.
- From the Settings menu, select Schedule & Details.
- Scroll down to the Requirements section.
- In the Hours of Effort per Week field, enter the number of hours you expect students to work on this course each week.
- View your course About page to see how the requirements will appear to students.
5.2.6. Set Course Prerequisites
You might want to make sure that your students have a specific set of skills and knowledge before they take your course. In addition to suggesting general requirements in your course overview, you can require students to complete specific prerequisite courses, or take an entrance exam, or both.
5.2.6.1. Specify Prerequisite Courses
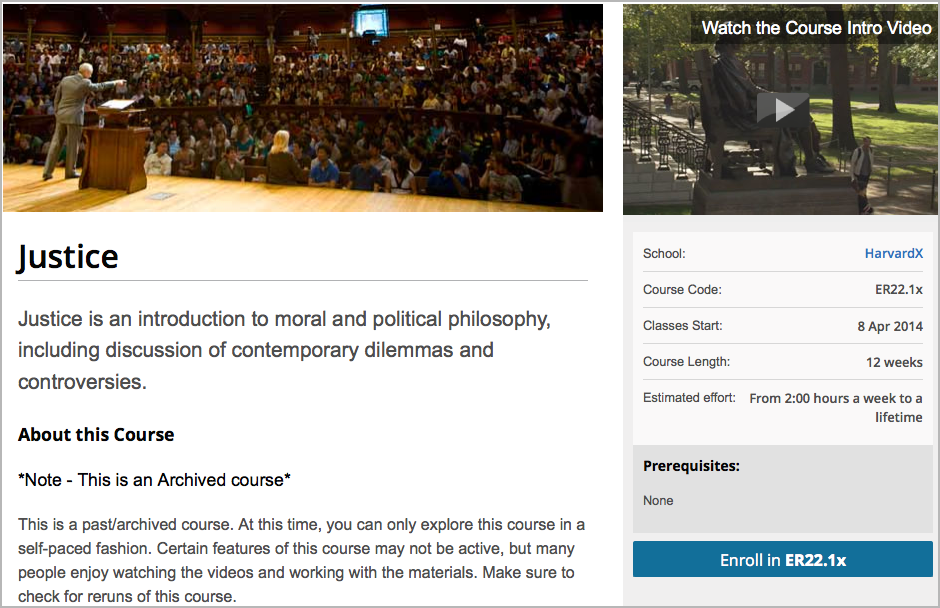
You can require that your students pass a particular edX course before they enroll in your course. Students see information about course prerequisites on the course About page.
If students have not completed the prerequisite course, they can enroll in your course and then see your course on the Student Dashboard. However, unlike with other courses, the Student Dashboard does not provide a link to the courseware. The Student Dashboard includes a link to the About page for the prerequisite course. Students can enroll in the prerequisite course from the About page.

To specify a prerequisite course, you must be a course author in both the current course and in the prerequisite course.
- In Studio, open your course.
- On the Settings menu, select Schedule & Details.
- On the Schedule & Details page, scroll to the Requirements section.
- Under Prerequisite Course, click the drop-down list to select a course.
- At the bottom of the page, select Save Changes.
Note
Currently, you can specify only one prerequisite course.
5.2.6.2. Require an Entrance Exam
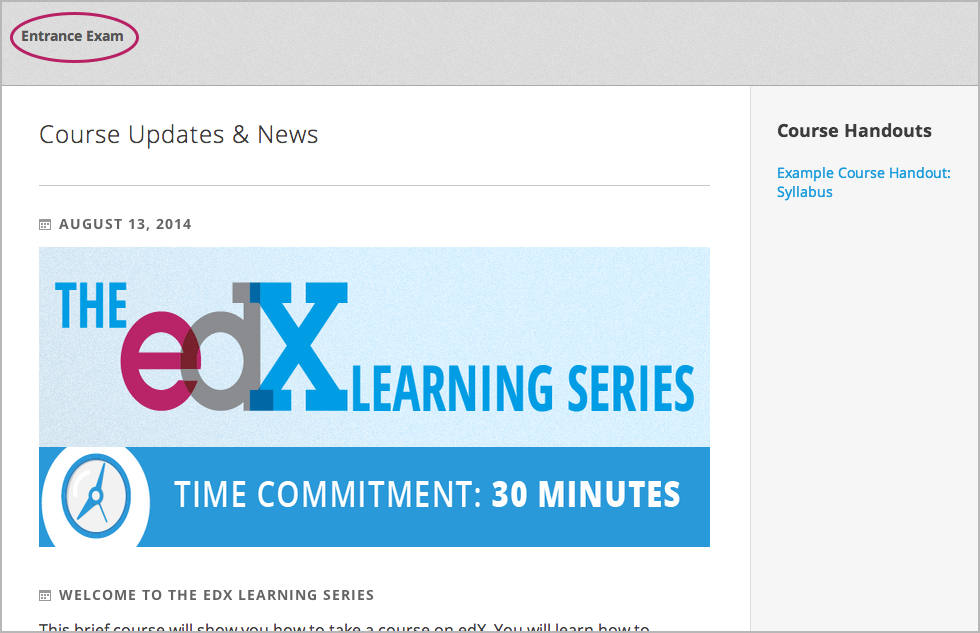
You can require your students to pass an entrance exam before they access your course materials. If you include an entrance exam, students who enroll in your course see only the Course Updates & News page and an Entrance Exam tab until they pass the exam.
After students pass the exam, they can access all released materials in your course.
To require an entrance exam, follow these steps.
- In Studio, open your course.
- On the Settings menu, select Schedule & Details.
- On the Schedule & Details page, scroll to the Requirements section.
- Select the Require students to pass an exam before accessing course materials check box.
- At the bottom of the page, select Save Changes.
After you save your changes, Studio automatically creates an Entrance Exam section in your course outline. To add content to your entrance exam, go to the course outline.
5.2.6.2.1. Best Practices for Entrance Exams
We strongly recommend that you follow several guidelines to help you and your students have a positive experience with entrance exams.
Make sure that your beta testers include the entrance exam when they test your other course content.
Make sure that you mention the entrance exam in the course description on your course About page. Otherwise, students will not know about the entrance exam before they enroll in your course and try to access course content.
Add an anouncement at the top of the Course Updates & News page that contains information and instructions for students who need to take the exam. When students first try to access content in a course that has an entrance exam, they see the Course Updates & News page. We suggest that you include the following information.
To begin the course entrance exam, students click the Entrance Exam tab on the left side of the screen.
After students complete the entrance exam, they have to click the Entrance Exam tab again or refresh the page in their browser. When the page refreshes, students can see all currently available course content.

5.2.6.2.2. Create an Entrance Exam from the Course Outline
You create your course entrance exam from the course outline in Studio. Creating entrance exam content is just like creating other course content. For more information, see Creating Course Content.
5.2.6.2.3. Adjust Scores in the Entrance Exam
If you find an error in the exam after students have taken it, and corrections to the exam are unavoidable, you have several options to rescore the exam for individual students. These options are available on the Instructor Dashboard.
On the Instructor Dashboard, click Student Admin, and then scroll to the Entrance Exam Grade Adjustment section. The following options are available.
- Reset Student Attempts: Reset the value for one particular student’s attempts back to zero so that the student can begin work over again. For more information, see Reset Student Attempts for a Problem.
- Rescore Student Submission: Rescore the responses that a student has submitted. For more information, see Rescore Student Submissions for a Problem.
- Delete Student State for Problem: Delete a student’s entire history for the exam from the database. For more information, see Delete Student State for a Problem.
Another option on the Instructor Dashboard is Show Background Task History for Student. If you reset student attempts, rescore student submissions, or delete student state, the operation runs in the background. If you want to see a record of all the operations that have run for the entrance exam, select Show Background Task History for Student.
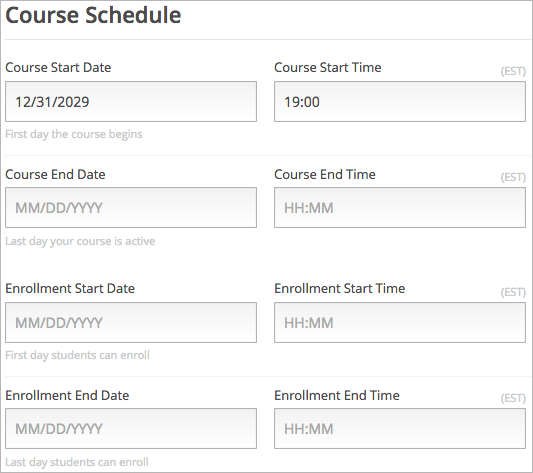
5.2.7. Set Important Dates for Your Course
You must set dates and times for enrollment and for the course.
In Studio, from the Settings menu, select Schedule and Details.
Follow the on-screen text to enter the course and enrollment schedule.
Note
The Time fields on this page, and the times that students see, use Universal Coordinated Time (UTC).
5.2.7.1. The Course Start Date
Note
The default course start date is set far into the future, to 01/01/2030. This is to ensure that your course does not start before you intend it to. You must change the course start date to the date you want students to begin using the course.
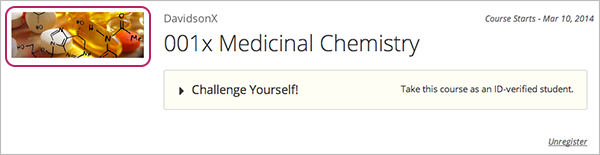
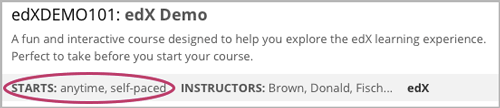
Students see the course start date and time on their Current Courses dashboards and on the course About page. Students can see some parts of the course before the course start date. For example, students can see your Course Info page and course-wide discussion topics as soon as they enroll in your course. For more information about course-wide discussion topics, see Create Course-Wide Discussion Topics.
The following example shows the course start date and time on the course About page:

In the dashboard, students see the start dates and times for each of their courses, as in the following examples.

Note
If you do not specify a start time for your course, students see the default start time, 00:00 Coordinated Universal Time (UTC).
5.2.7.2. Set the Advertised Start Date
You can set an advertised start date for your course that is different than the course start date you set in the Schedule and Details page. You may want to do this if there is uncertainty about the exact start date. For example, you could advertise the start date as Spring, 2014.
To set an advertised start date:
- From the Settings menu, select Advanced Settings.
- Find the Course Advertised Start Date policy key. The default value is null.
- Enter the value you want to display as the advertised start date. You can use any string, enclosed in double quotation marks. If you format the string as a date (for example, as 02/01/2014), the value is parsed and presented to students as a date.

- Click Save Changes at the bottom of the page.
The start date shown on the dashboard is now the value of the Course Advertised Start Date policy key:
If you do not change the default course start date (01/01/2030), and the
Course Advertised Start Date policy value is null, then the student
dashboard does not list a start date for the course. Students just see that
the course has not yet started.
5.2.7.3. The Course End Date
The course end date is the date after which students can no longer earn credit toward certificates. Students who have earned certificates can view them after the course end date.
Important
If you do not set a course end date, students will not be able to access earned certificates.
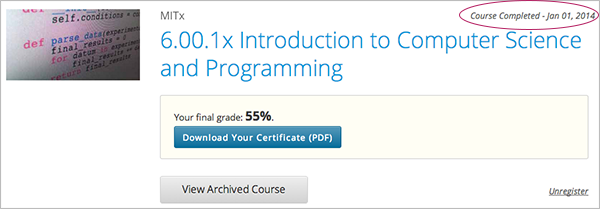
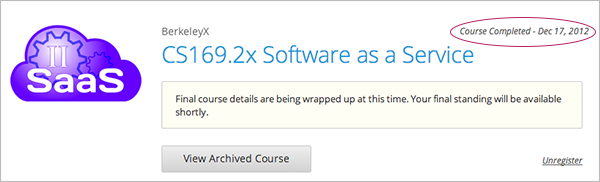
After grades and certificates are finalized, students see the course end date on their personal Current Courses dashboards, as shown in the following examples.
If grades and certificates are not yet finalized, students can see the course end date and a message:
When grades and certificates are finalized, students who have not earned a certificate see their score and the score required to earn a certificate:
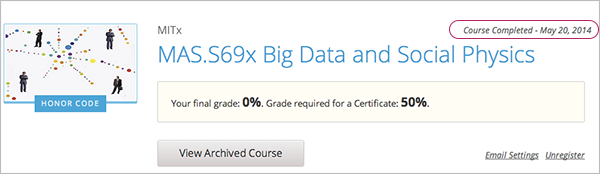
Students whose final score is equal to or higher than the required score can click Download Certificate to get their certificates as PDFs: