13.3. Create a Proctored Exam with RPNow#
After you enable proctored exams for your course, you can create a proctored exam or a practice exam using your choice of either RPNow or Proctortrack. To create a proctored exam or a practice proctored exam for RPNow, follow these steps.
Note
Practice proctored exams are visible to all learners, regardless of enrollment track.
Add and develop a subsection as you would any other subsection.
For a practice proctored exam, edX recommends that you include only a few problems in this subsection. Or, you could add a unit with a text component that provides information about the exam.
Select the Configure icon for the subsection.
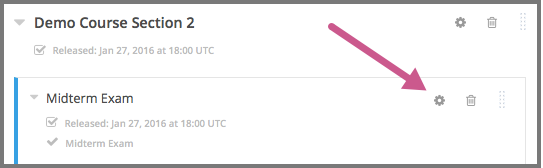
The Settings dialog box opens to the Basic tab.
In the Grading section, set the assignment type and due date for the subsection.
Note
For a practice proctored exam, leave the assignment type as Not Graded.
Select the Advanced tab, and then locate the Set as a Special Exam section.
Select the proctored exam type.
For a proctored exam, select Proctored.
For a practice proctored exam, select Practice Proctored.
Note
Once the exam content has been released to students, the special exam type cannot be modified.
In the Time Allotted field, enter the length of time that you want to allow for the exam as HH:MM, where HH is hours and MM is minutes.
(optional) For a proctored exam, in the Review Rules field, enter any additions or exceptions to the default rules for proctored exams. For more information, see Specify Exam Rules and Exceptions.
Select Save.
13.3.1. Specify Exam Rules and Exceptions#
By default, reviewers evaluate exam attempts according to a standard set of online proctoring rules that the proctoring service has provided.
Note
The course grace period setting does not apply to proctored exams. For more information about the grace period setting, see Set the Grace Period.
You can also provide custom rules for a particular exam. For example, you might allow learners to use a calculator, or to have one sheet of blank paper. These rules are visible to reviewers and learners at the start of each proctoring exam.
To specify custom proctored exam rules, follow these steps.
Note
Your additional rules must be clear, specific, and easy to understand so that reviewers do not incorrectly review a learner’s exam. Use simple sentences and words for a global English speaking audience.
In Studio, open your course outline and select the subsection for the exam.
Select the Configure icon to open the Settings dialog box.
Select the Advanced tab, and then locate the Set as a Special Exam section.
In the Review Rules field, enter any additional rules. For example, you might enter the following rule.
Allow one blank sheet of paper and a pencil or pen. Allow a hand-held
calculator on the desk.
Select Save.