9.4. Adding a Video to a Course#
To make a video visible in your course, you create a video component in a Unit in Studio, and then you add information for the video to the video component. The information is different for courses on edx.org and courses on Edge.
9.4.1. Add a Video to an edx.org Course#
Note
This information applies only to courses that run on the edx.org site. For information about adding videos to courses that run on Edge, see Add a Video to an Edge Course.
For courses on edx.org, you add the following information to the video component:
A display name for the component.
The video ID that the upload process automatically creates for your video. To find the video ID, see Copy the Video ID.
The transcript for your video, for videos with non-integrated transcripts.
9.4.1.1. Copy the Video ID#
To copy the video ID, follow these steps.
Open the course in Studio.
On the Content menu, select Videos.
Locate the video that you want to include in the course.
Click on the three dot menu, the select “Copy video ID”. The video ID is assigned when you upload a video.
Note that the course team can add a video to their course as soon as the unique video ID is visible on the Videos page. However, for a video to play successfully, the status for the file must be “Ready”. Processing takes 24 hours to complete for all encodings and all video hosting sites.
You can also download a report of all uploaded videos. The report includes the video ID for every uploaded file.
9.4.1.2. Add a Video Component#
Note
This information applies only to courses that run on the edx.org site. For information about adding videos to courses that run on Edge, see Add a Video to an Edge Course.
To add a video and its transcript to an edx.org course, follow these steps.
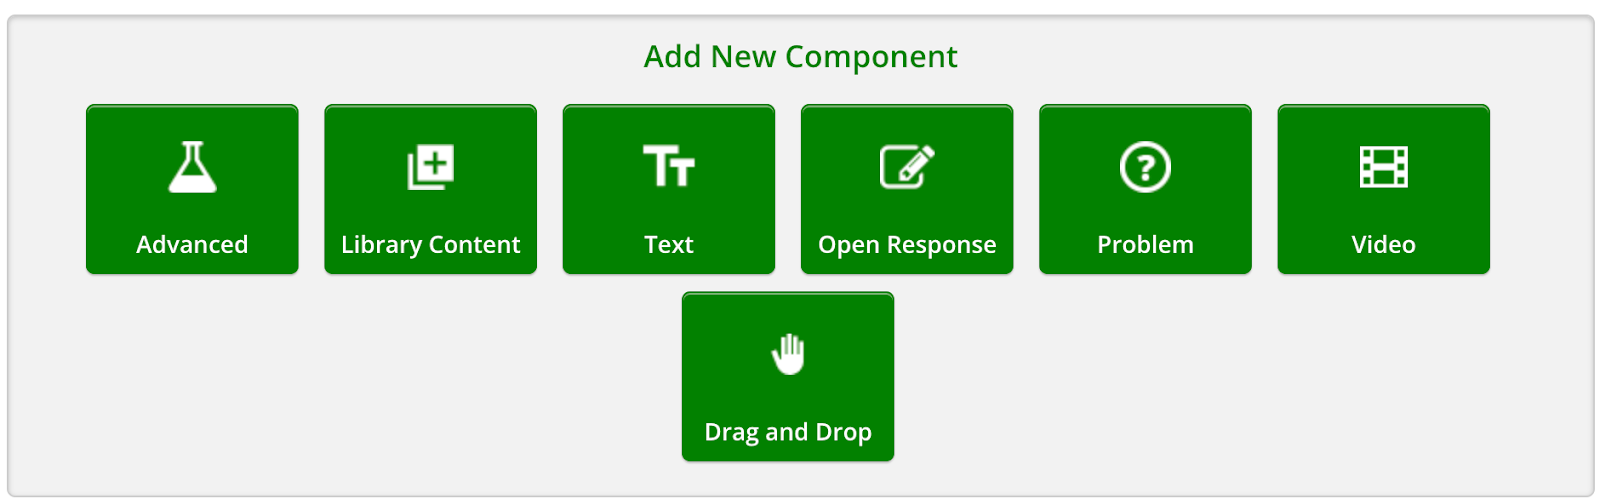
In Studio, locate the unit that you want, and then select Video under Add New Component.
Select the pencil icon in the top left hand corner, and enter the name that you want learners to see for this video as the Component Display Name.
This name appears as a heading above the video in the LMS, and it identifies the video for you in Insights. If you do not enter a display name, the platform specifies “Video” for you. Clicking the “Check” icon will save your changes, the “X” icon will discard them.
Under Video Source, in the Video ID field, enter the Video ID, or Video URL fields, enter the streaming media link, or video file URL.
Note
When you add the video ID, you do not need to add values to the Video URL or Fallback Video fields. The URLs that are associated with the video ID override any existing values in other fields.
Optionally, you can set more options for the video. For a description of each option, see Set Video Settings.
Select Save to save the video component.
9.4.1.3. Add New or Previously Uploaded Video to Course on edx.org#
If you are in a Unit in your course and you want to add a previously uploaded video, click on the green video tile.
You now see a list of all the videos that you have previously uploaded. You can search for specific videos within the Search bar, filter by date added (newest/oldest), name (ascending/descending), or duration (longest/shortest). You can sort by video status (uploading, processing, ready, failed). To add a video to your course, click on the video you want to add and then click on Select video.

To upload or embed a new video, click on the link on the bottom left side of the Add video to your course page. You can drag and drop a video, click to upload a video, or paste your video ID or URL in the text box.
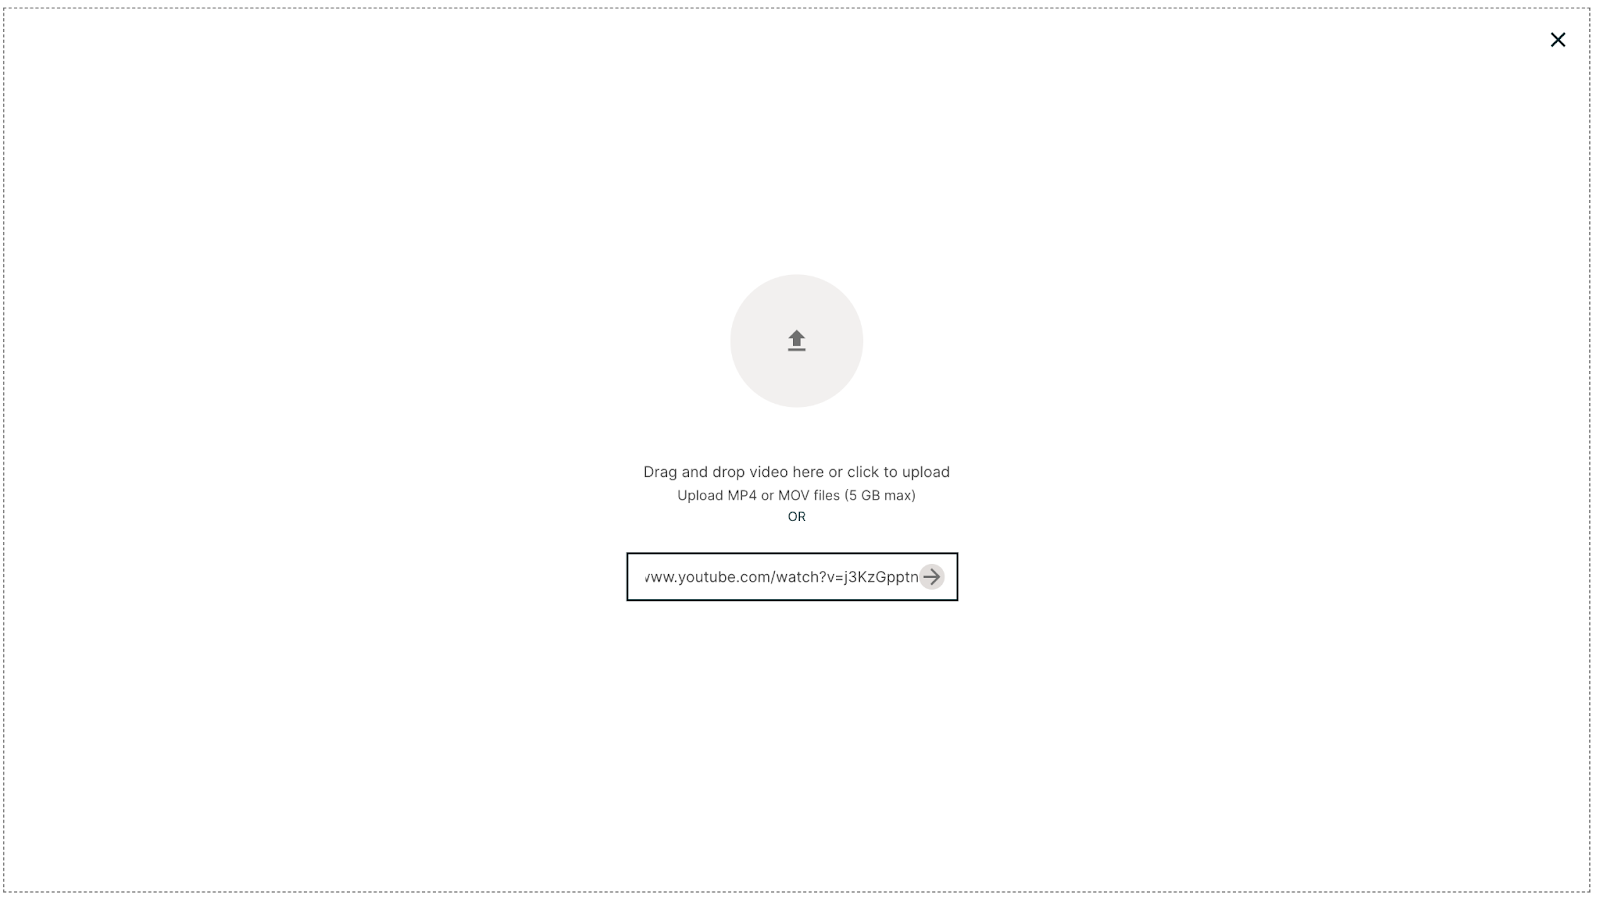
In the screenshot above, a Youtube URL was pasted into the text box. If you click the right arrow in the box, you are taken to the Video Settings page (screenshot below). If you click Save, the video is added to your course. If you click on Replace video, you are taken back to the Add video to your course page.

9.4.2. Add a Video to an Edge Course#
Note
This information applies only to courses that run on the Edge site. For information about adding videos to courses that run on edx.org, see Add a Video to an edx.org Course.
For courses on Edge, you add the following information to the video component.
A display name for the component.
The video location.
The video location is the video URL that is created when you upload the video to the hosting site. The video URL might resemble the following example.
https://s3.amazonaws.com/edx-course-videos/edx-edx101/EDXSPCPJSP13-G030300.mp4The video transcript
9.4.2.1. Add a Video#
To add a video to an edge.edx.org course, follow these steps.
In studo, locate the unit that you want, an then select Video under Add New Component.
Select the pencil icon, in the top left hand corner, and enter the name that you want learners to see for this video as the Component Display Name. Clicking the “Check” icon will save your changes, the “X” icon will discard them.
This name appears as a heading above the video in the LMS, and it identifies the video for you in Insights. If you do not enter a display name, the platform specifies “Video” for you.
Locate the Video URL field, and then enter the location of your video. This is the URL that was created when you uploaded the video to the hosting site.
Note
If you have created multiple versions that use different encodings or hosting services, add the URL for each video by selecting Add a vido URL below the Fallback Videos field and enter the URL in the Video URL field. The first listed video that is compatible with the learner’s device plays.
For the best experience for mobile users, make sure that the URL for the 360p version of the video is the first URL in the list.
Optionally, you can set more options for the video. For a description of each option, see Set Video Settings.