13.5. Create a Proctored Exam with Proctortrack#
After you enable proctored exams with Proctortrack for your course, you can create proctored exams.
To create a proctored exam for Proctortrack, you first create a single Onboarding exam subsection in your course, and then create one or more proctored exam subsections.
The Onboarding exam is a practice proctored experience which ensures the learner’s computer passes system requirements and establishes the learner’s identity with Verificient by creating an onboarding profile.
13.5.1. Creating an Onboarding Subsection#
Proctortrack requires all learners to complete an onboarding process before they take a proctored exam. In the onboarding process, learners download and install the necessary client software and verify their identity with Proctortrack.
Note
Onboarding includes a mandatory identity verification step which establishes an identity baseline with Verificient. This is required to gain access to the first Proctored Exam, and can take 5+ business days for learners to complete, so we recommend you:
Create an Onboarding subsection in the first section of any course using Proctortrack proctoring, as described below.
Add in-course messaging that completing Onboarding early is important, and that access to Onboarding requires to be in a paid track (e.g. Verified or Master’s).
Nudge learners who have not yet completed Onboarding a week before the first proctored exam.
This identity baseline is aged off every 1 year. A valid baseline will work across future Proctortrack courses on edX.org as well, but we recommend learners re-take Onboarding as a practice exam in every course, to make sure their current system is still ready for proctoring in advance of each proctored exam.
To set up Proctortrack onboarding for your course, follow these steps.
Add and develop a subsection as you would any other subsection.
Change the name to something clear to learners, like “Proctortrack Onboarding”.
As in the note above, add instructions to learners, explaining why it is important to complete Onboarding early.
Position the Onboarding subsection at an early stage in your course - we recommend positioning it in the first section.
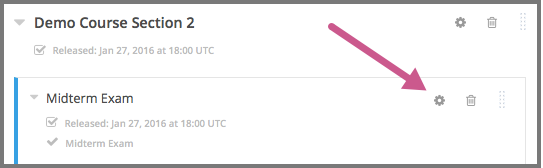
Select the Configure icon for the subsection.
The Settings dialog box opens to the Basic tab.
In the Grading section, set the assignment type and due date for the subsection.
Select the Advanced tab, and then locate the Set as a Special Exam section.
Select the exam type to Onboarding.
Note
Once the exam content has been released to students, the special exam type cannot be modified.
Select Save.
13.5.2. Creating a Proctored Exam#
Add and develop a subsection as you would any other subsection. This subsection must come after the onboarding subsection.
Select the Configure icon for the subsection.
The Settings dialog box opens to the Basic tab.
In the Grading section, set the assignment type and due date for the subsection.
Select the Advanced tab, and then locate the Set as a Special Exam section.
Select the exam type to Proctored.
Note
Once the exam content has been released to students, the special exam type cannot be modified.
In the Time Allotted field, enter the length of time that you want to allow for the exam as HH:MM, where HH is hours and MM is minutes.
Select Save.
13.5.3. Specify Exam Rules and Exceptions#
To specify the exam rules for a proctored exam with Proctortrack, follow these steps.
In Studio, open your course outline and select the subsection for the exam.
In the course outline, select Proctoring Settings.
The Verificient Proctortrack dashboard opens in a new browser window. Navigate to this window.
(optional) Open the Identify Verification tab. Select the identity verification rules that you want to enforce for the in-exam identity check and disable the rules that you do not want to enforce.
(optional) Open the Test Settings tab. Select the rules that you want to enforce for the proctored exam and disable the rules that you do not want to enforce.
(optional) Open the Student Settings tab. Specify any per-learner special exam exemptions and accommodations (Test Settings, Whitelist Url/Apps, or Special Notes for custom student needs). This information will be sent over to the exam reviewers along with the learner’s attempt.